¶ Deploy a Digital Redeem Badge
This tutorial is about how to deploy digital redeem badges.
Digital Redeemable Badges are a dynamic feature within the Galaxis platform, offering a unique and interactive experience for community members. These badges can be placed on membership cards and serve as a key to unlocking a variety of digital rewards and exclusive content.
Digital Redeemable Badges allow cardholders to claim specific digital items or benefits associated with their community. This could range from exclusive digital art and NFTs to special access to online events or content. The process is straightforward – members simply use their membership card with the Digital Redeem Badge to claim their reward, either directly on the Galaxis platform or through a linked external system.
¶ Prerequisites:
- Have at least a launched Membership collection, but it is recommended to have a launched secondary collection.
- Have/had a private or public mint.
- Have minted cards by the community members.
- Have a deployed Shop app.
- Have a created Coin Shop or NFT Shop.
Note: If you want to place a Digital Redeem Badge on a secondary collection, make sure that you have the reveal process executed (if it is an unrevealed collection), because otherwise the badges will not be visible on the cards, although they are placed on them.
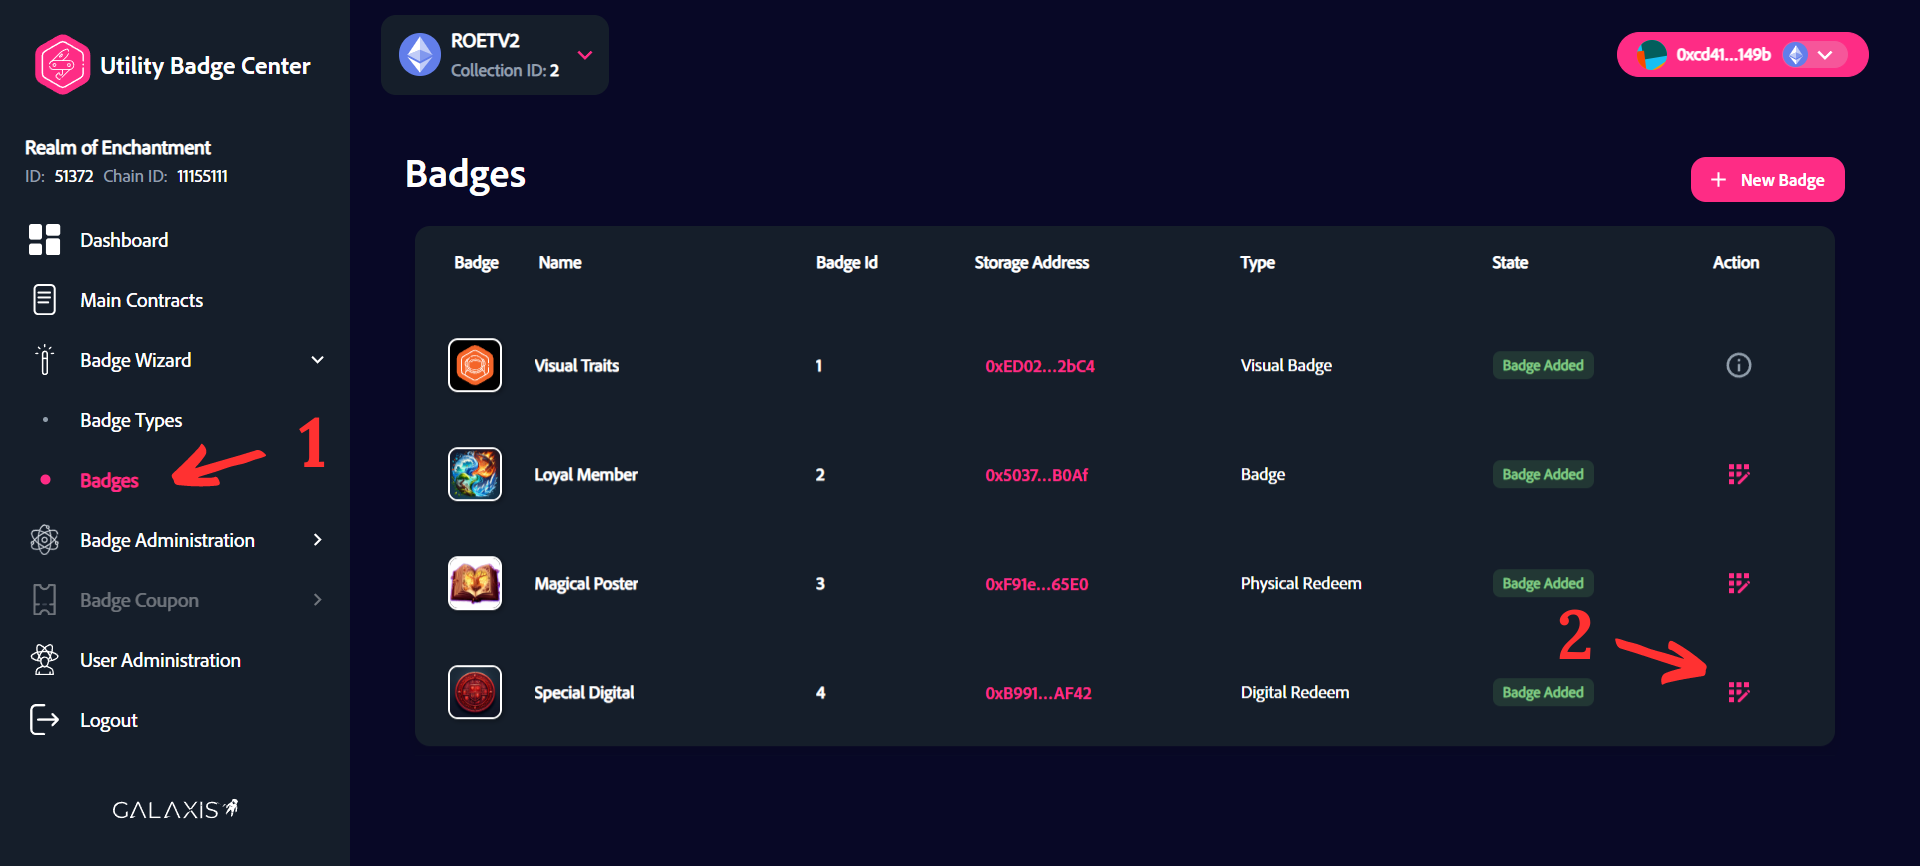
¶ Step 1
You are on the UBC Dashboard:
- Select the “Badge Wizard” -> “Badges” menu.
- Click on the “New Badge” button.
¶ Step 2
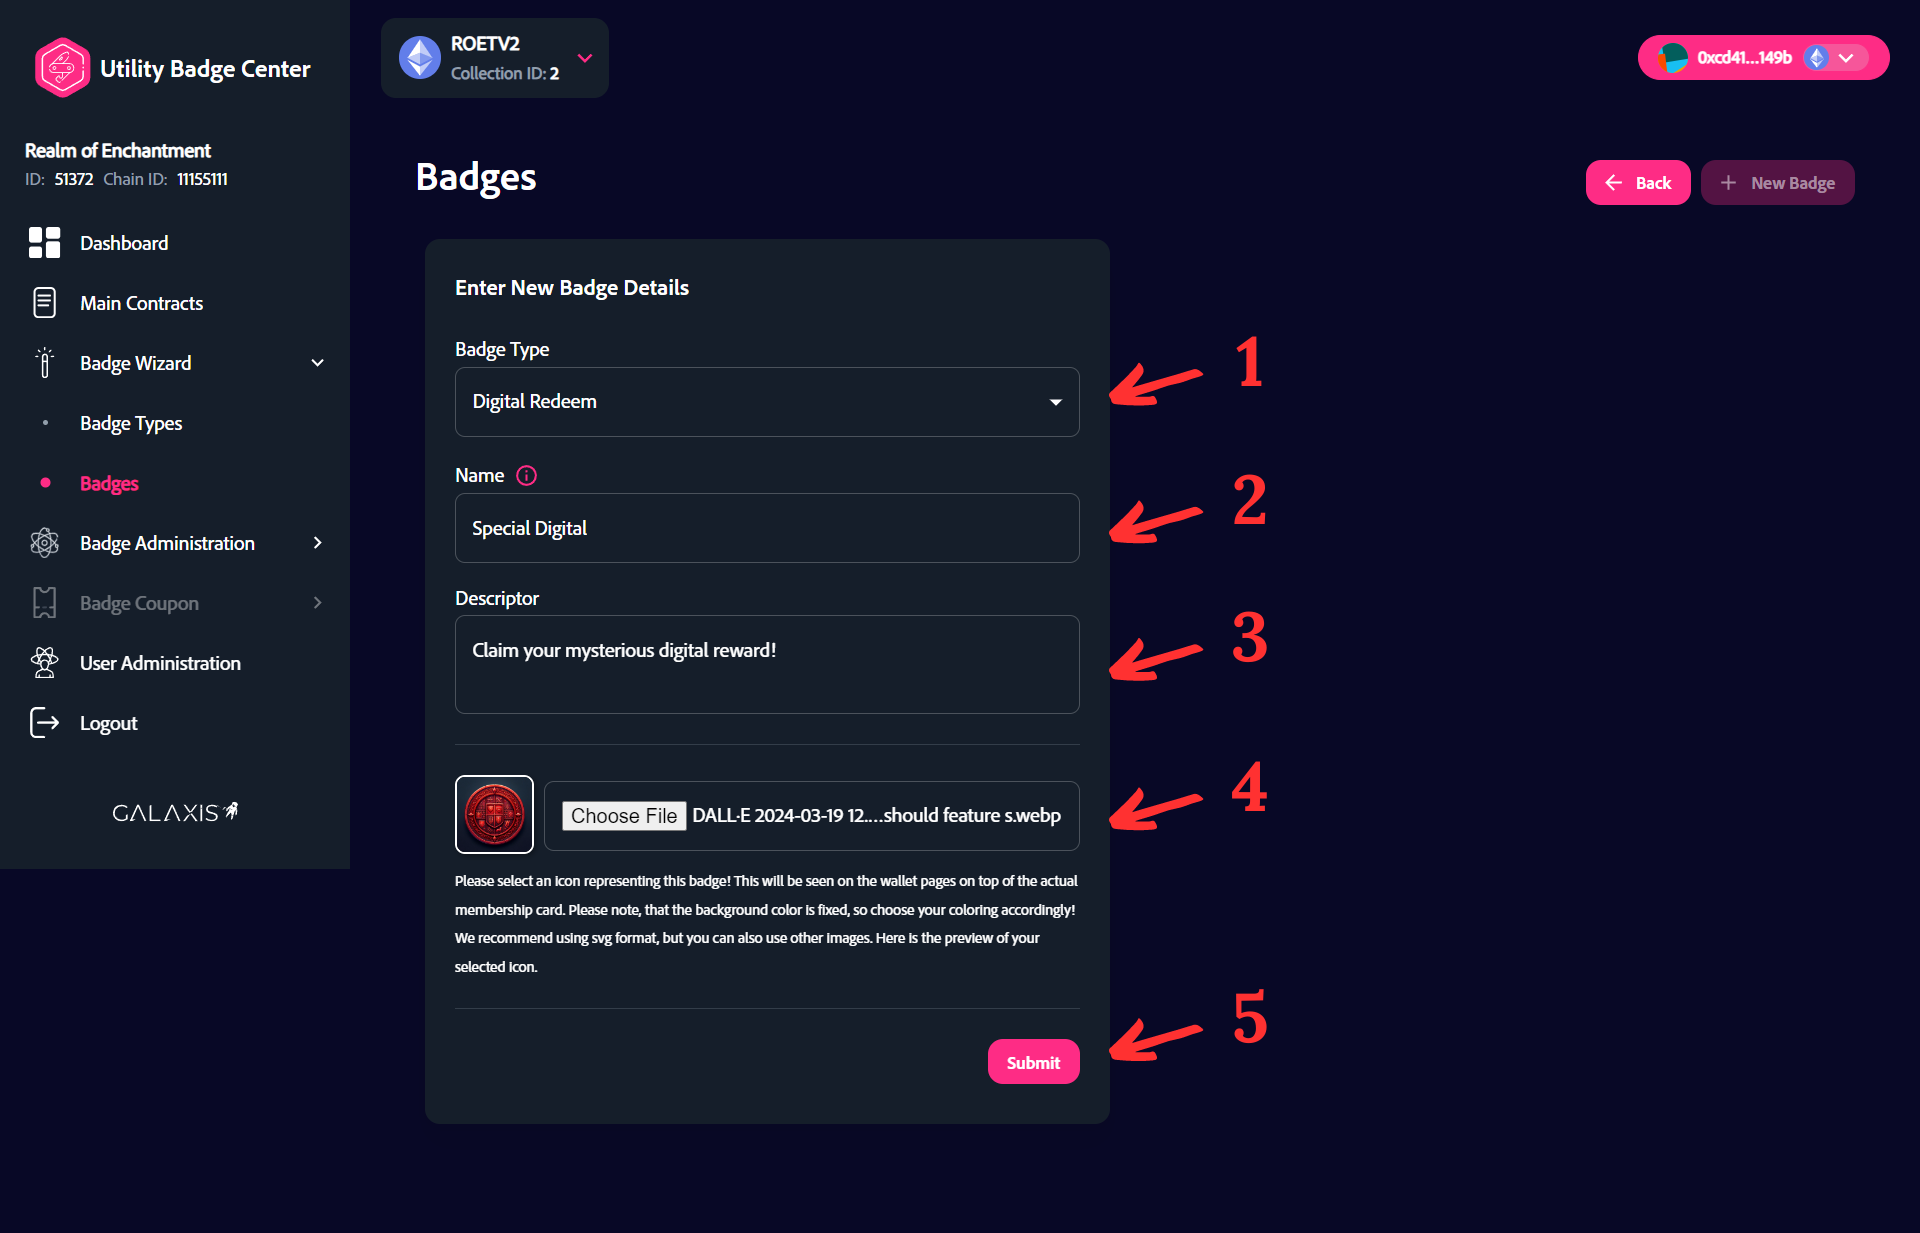
In this step you can create a new Digital Redeem Badge.
- From the Badge Type dropdown list select “Digital Redeem”.
- Provide a name for the badge.
- Provide a description for the badge.
- Upload an image for the badge.
- Click on the “Submit” button.
¶ Step 3
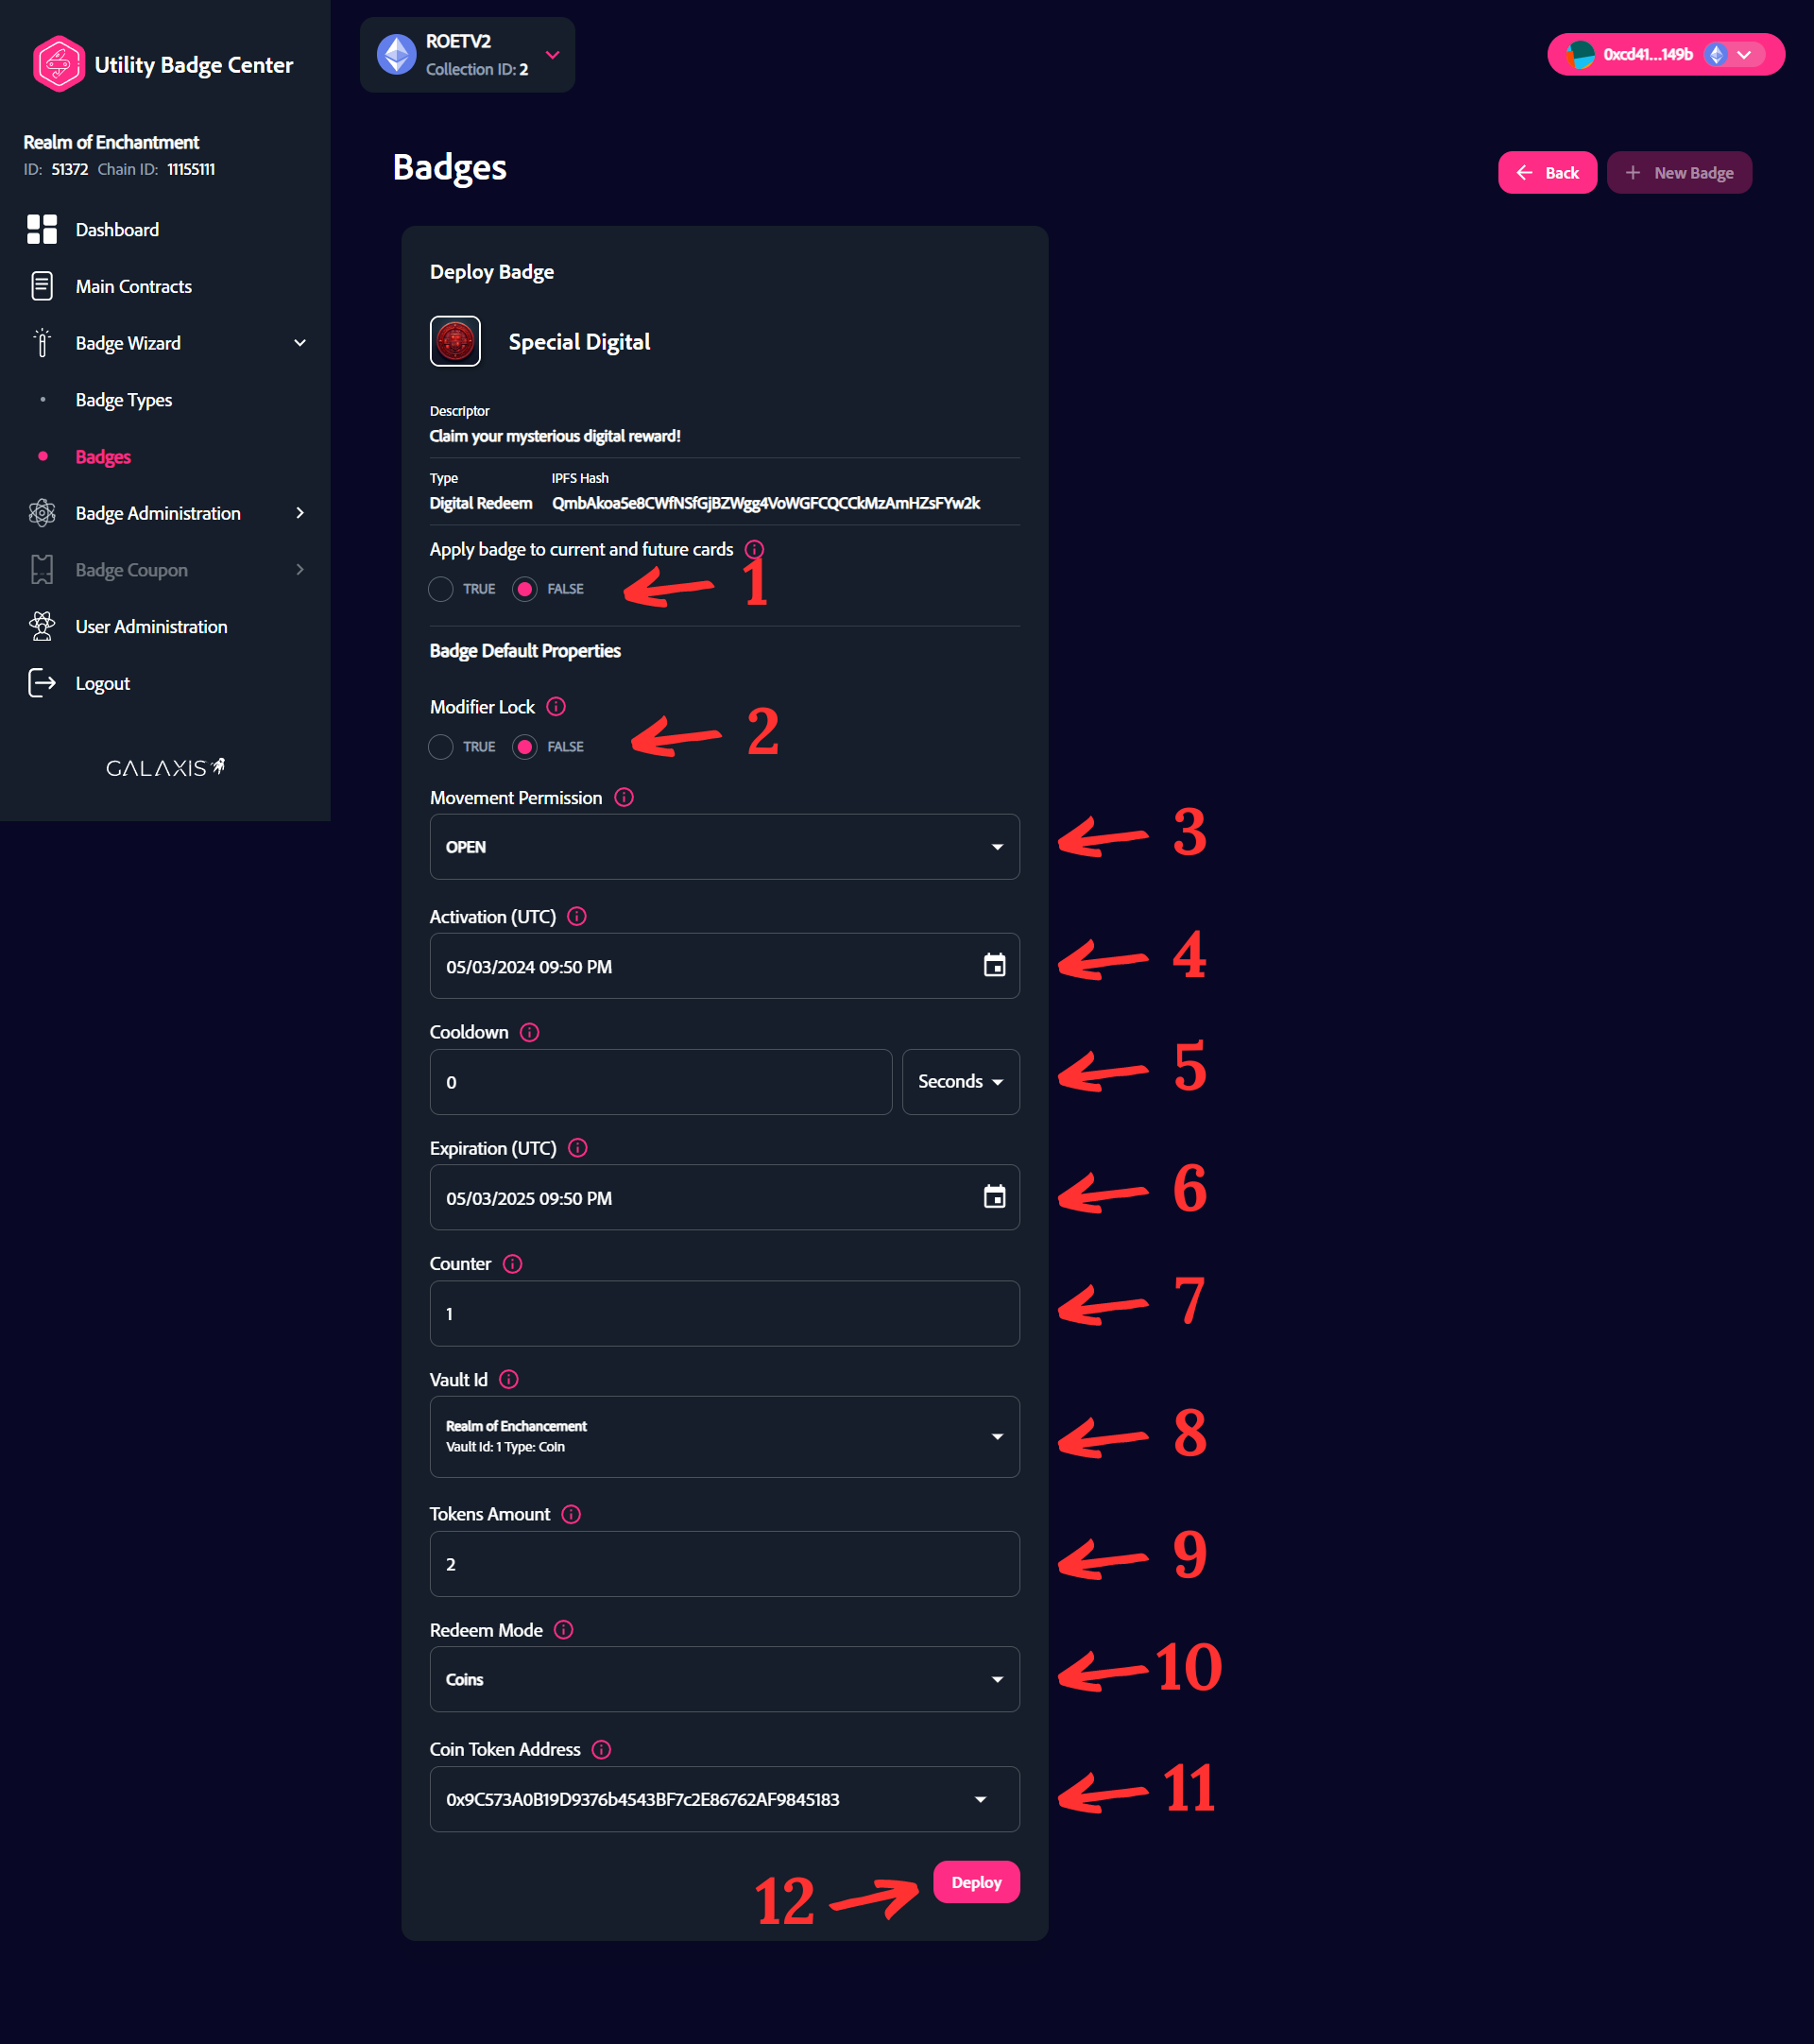
In this step you can specify the properties of your badge.
- Check the TRUE or FALSE box to apply the badge by default to currently minted and future minted cards.
- Select TRUE or FALSE for Modifier Lock. If set to true, then the badge will not accept any other "Modifier trait" to alter its attributes.
- Set the Movement Permission. Here you have four options:
OPEN: Badge can be detached from the card.
LOCKED: Badge can not be detached from the card.
SOULBOUND: If the card moves to another address, the badge won't operate.
SOULBURN: If the badge moves to another address, the badge burns. - Set the Activation date and time for the badge. By default the acivation time is set to the time of badge creation. This means that the badge can be operational from the moment of placing it on the cards.
- Set the Cooldown - it is the minimum time interval between badge usages. 0 means no cooldown. The time unit can be defined in seconds, minutes, hours, or days.
- Set the Expiration date and time for the badge. The badge will be operational until this date and time.
- Set the Counter - the number of times this badge can be claimed.
- Select the prize shop.
- Set the Tokens Amount.
- Select the Redeem Mode.
- Select the Coin Token Address.
- Click on the “Deploy” button.
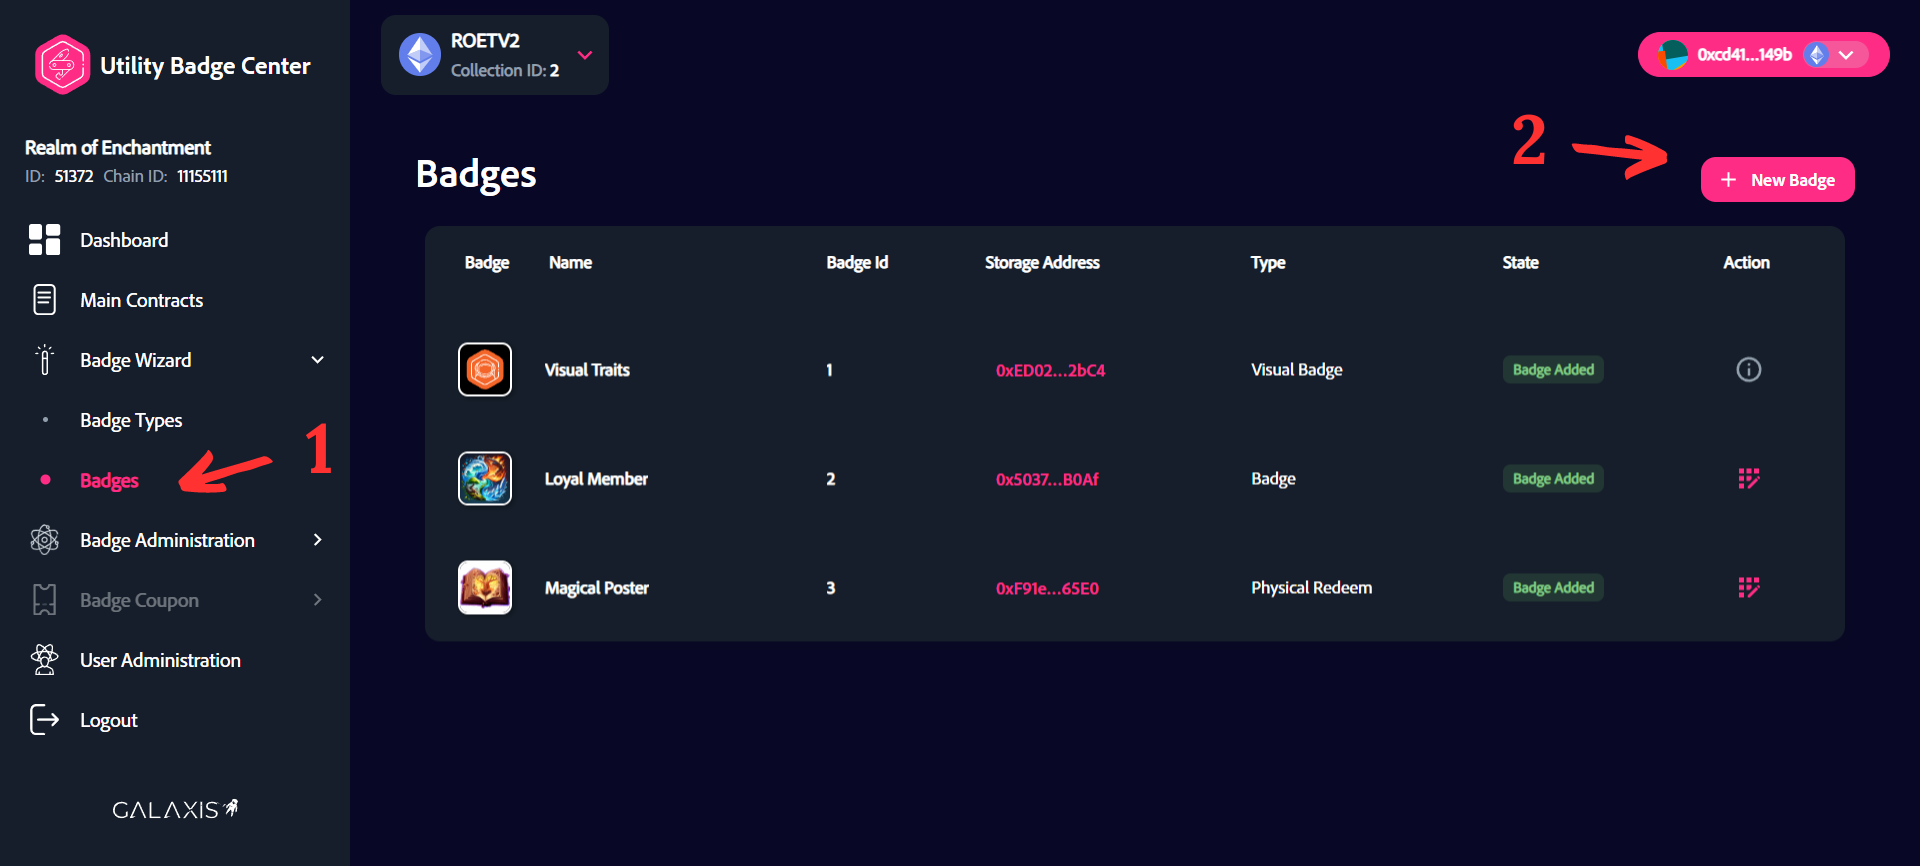
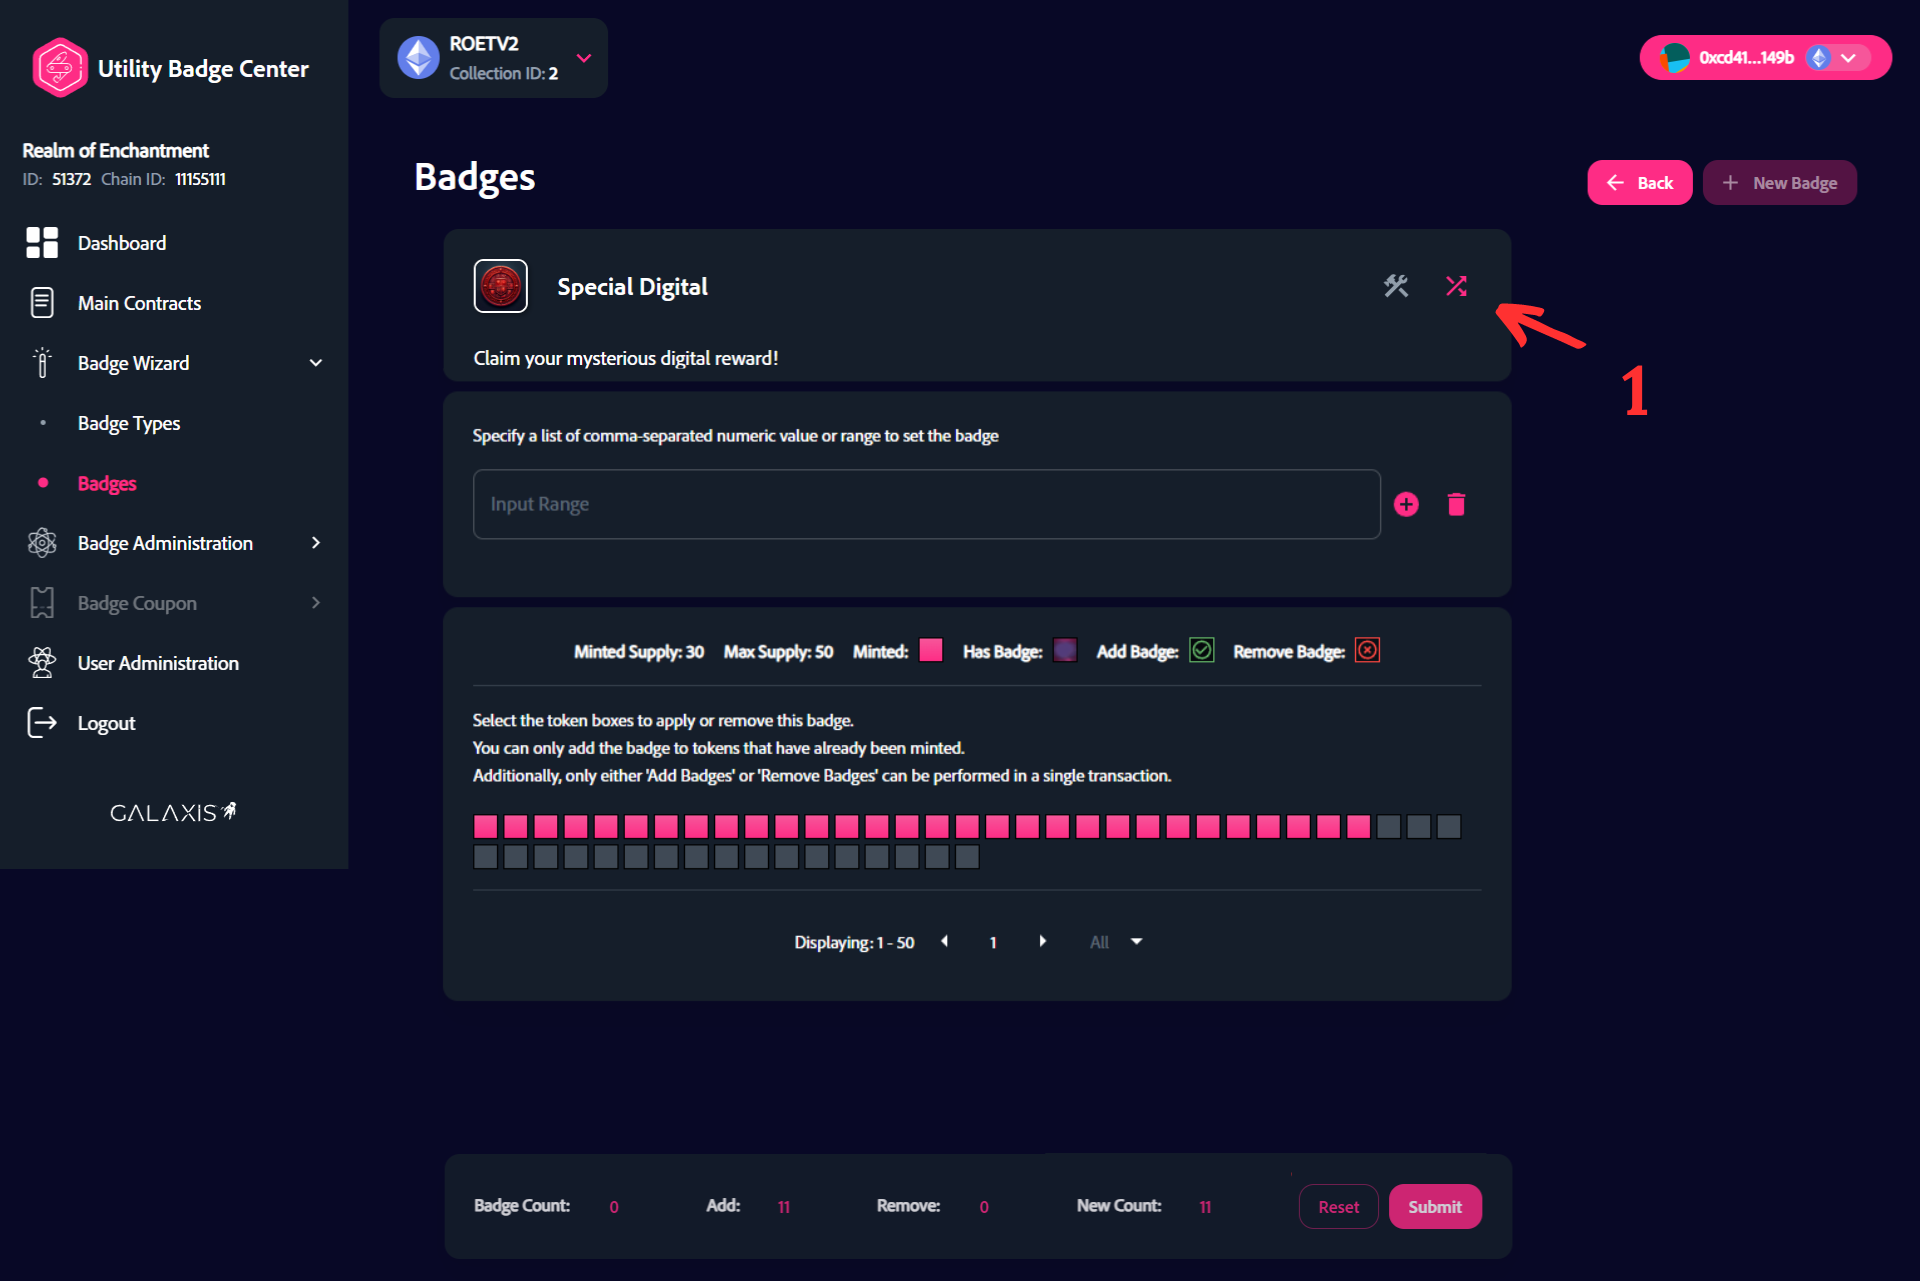
¶ Step 4
In this step you can select the already created badge to work with.
- Select the “Badge Wizard” -> “Badges” menu.
- Click on the edit action symbol.
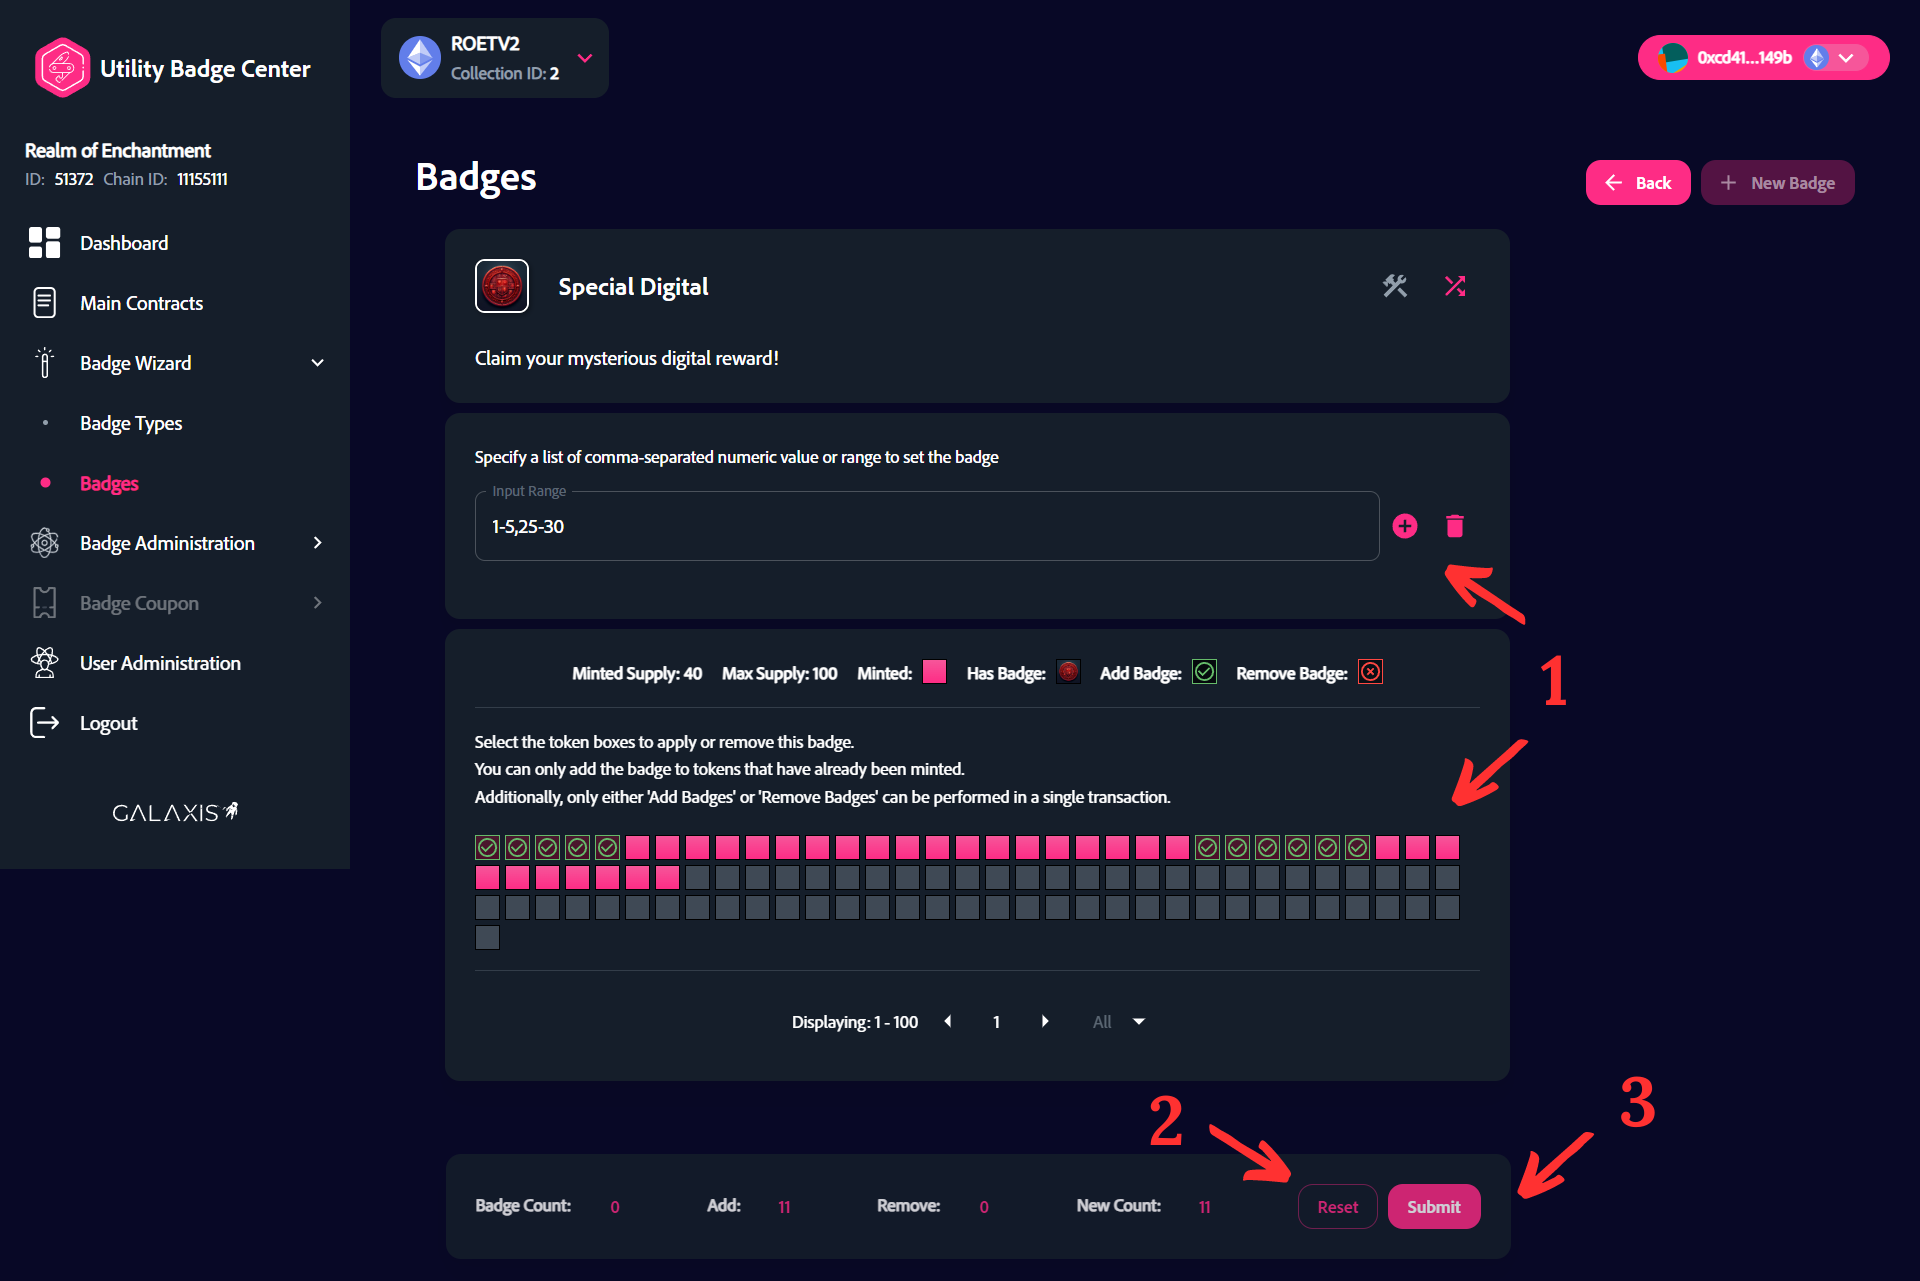
¶ Step 5 - Set manual drop
In this step you can specify the cards to which you want to add the badge. If you selected option: TRUE - apply the badge by default to currently minted and future minted cards, than here you can see that the badge is already added to all minted cards.
- Set the input range for which cards you want to add the badge OR manually select by clicking on them.
- Click on the “Reset” button to reset the modifications.
- Click on the “Submit” button to submit the modifications.
¶ Step 5.2 - Set random drop
In this step you can specify the cards randomly using VRF to which you want to add the badge.
- Click on the "Random Drop" icon to access the feature.
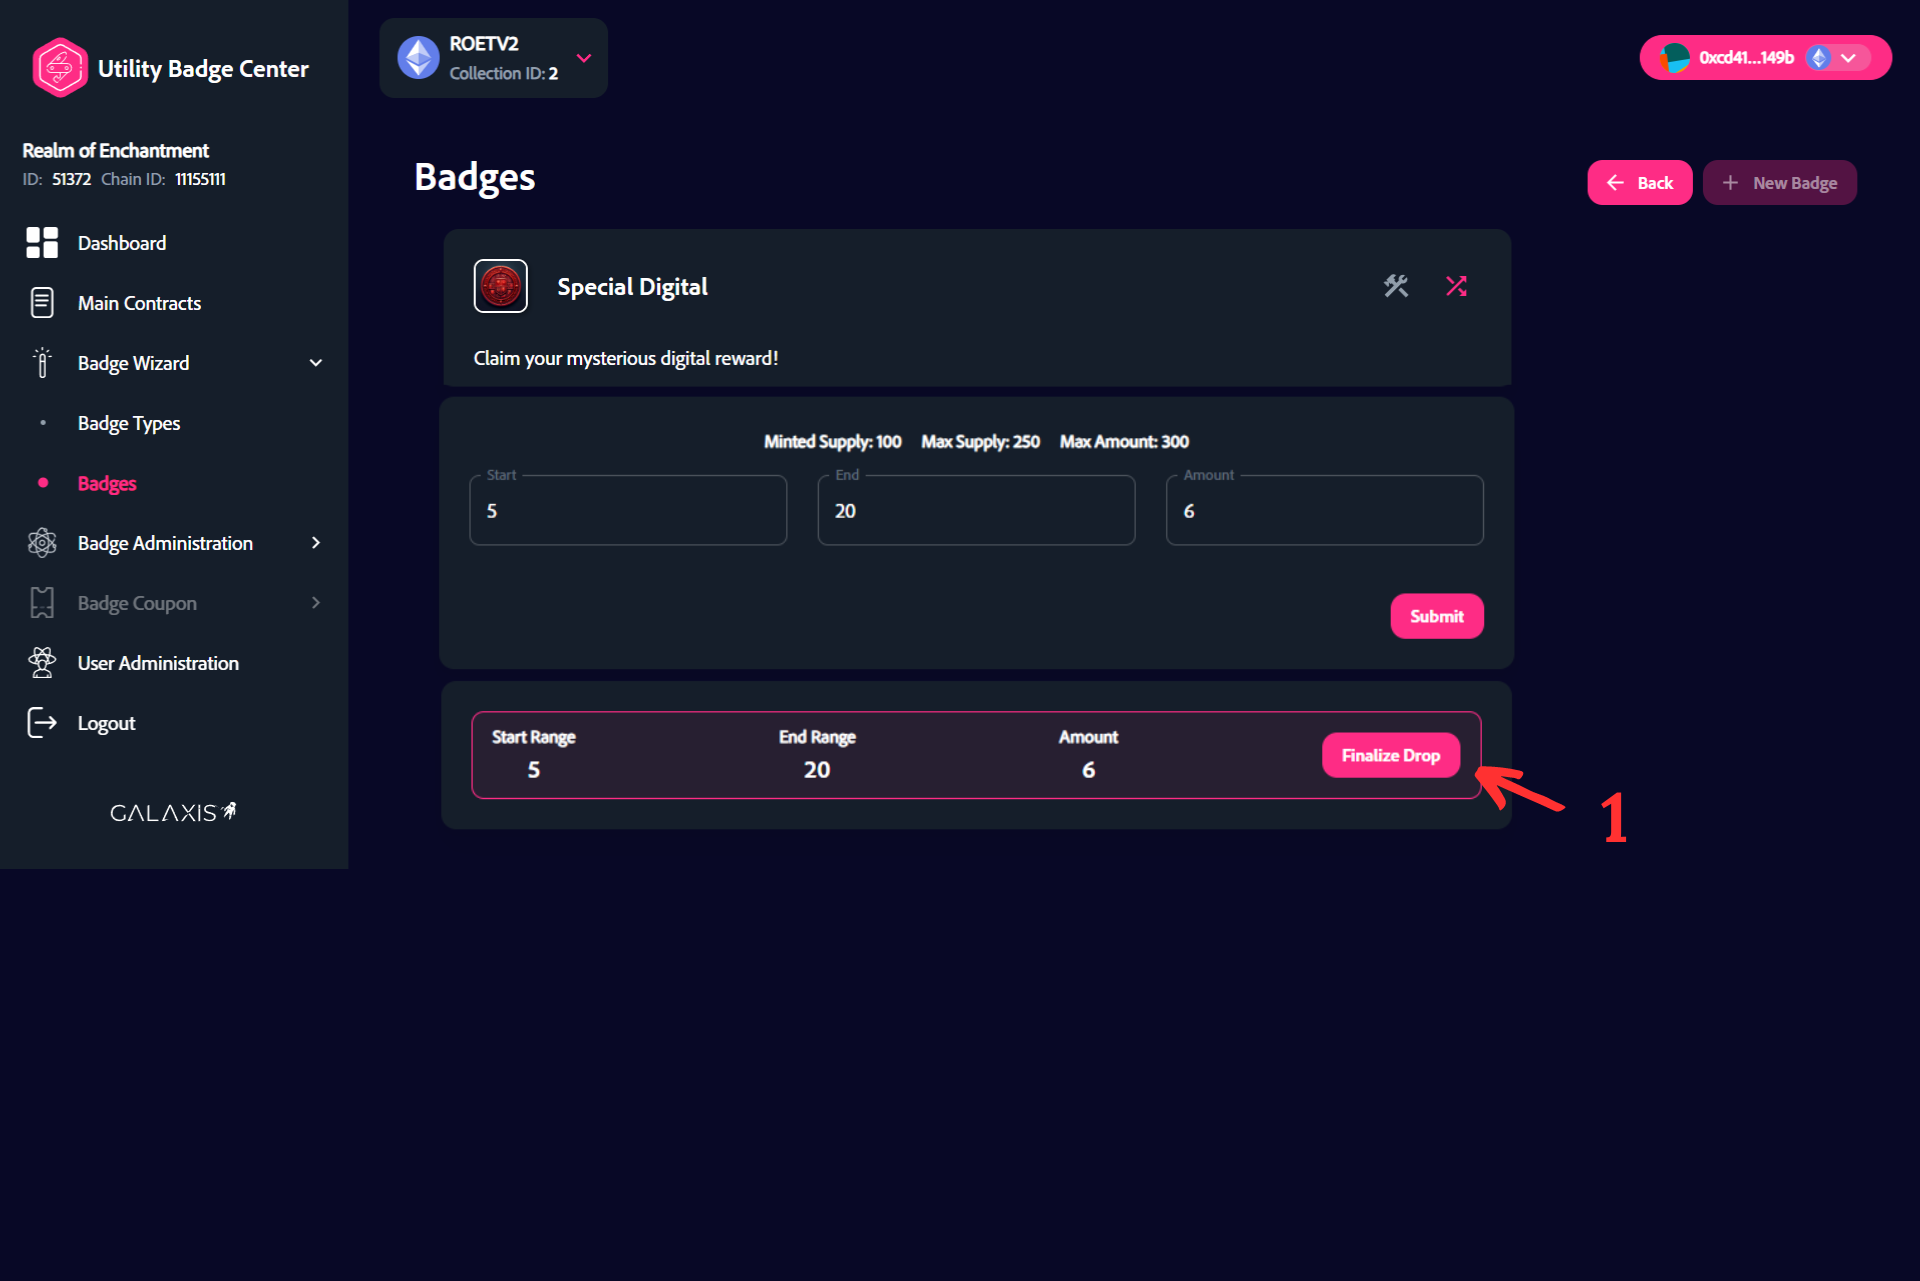
¶ Step 5.3 - Set random drop
Set the parameters for random badge drop.
- Set the start for the random drop range.
- Set the end for the random drop range.
- Set the amount for random drop.
- Click on the "Submit" button to proceed.

¶ Step 5.4 - Set random drop
At the end of the previous step you need to sign the transactions in your wallet.
- When everything is set up click on the "Finalize Drop" button to finish the deployment.