¶ Community creation (website and membership collection)
To introduce and describe your community to the world, you will need a few assets. To make sure that the community creation process is the smoothest possible, it helps if you can prepare the following things before you start:
- an introduction or short description of the community (this short description is used on pages where your community is shown together with other communities), together with
- a small banner image (recommended size: 750x750px),
- a detailed description (this text is shown on your own community page, where you introduce your community to your existing and future members in detail), together with
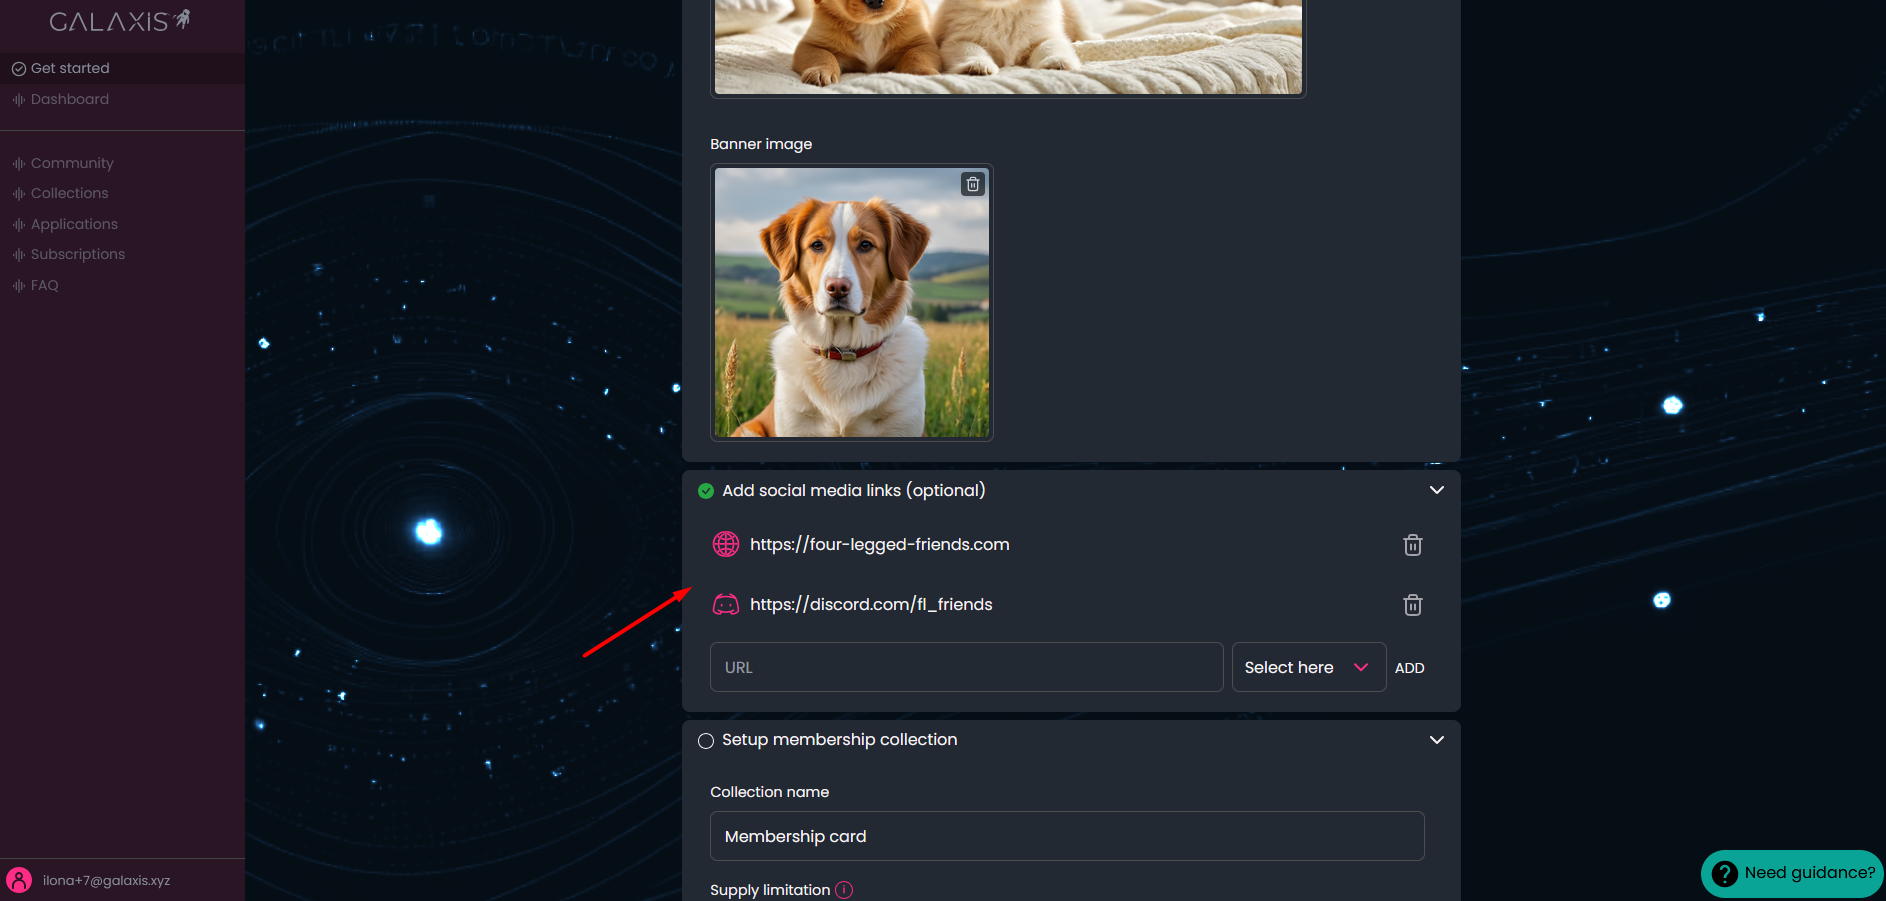
- a cover image (recommended size: 3840x1000px).
- Finally, you will need some artwork for your membership cards. Your membership card design can be very simple (all cards look the same) or very complex (using different pictures) and a lot in between... just make sure you prepare images of the same size in PNG or JPG format, and you are using images with size less than 4 MB.
¶ Prerequisites
- You need to be registered at Galaxis with an e-mail address or crypto wallet, and be logged in to the community admin interface (Mission Control).
¶ The process
After login, you will see the following page that contains the 4 main parts required for a community website along with the membership collection.

- When you open the Customize community tab you will see the information you have already provided during account registration.
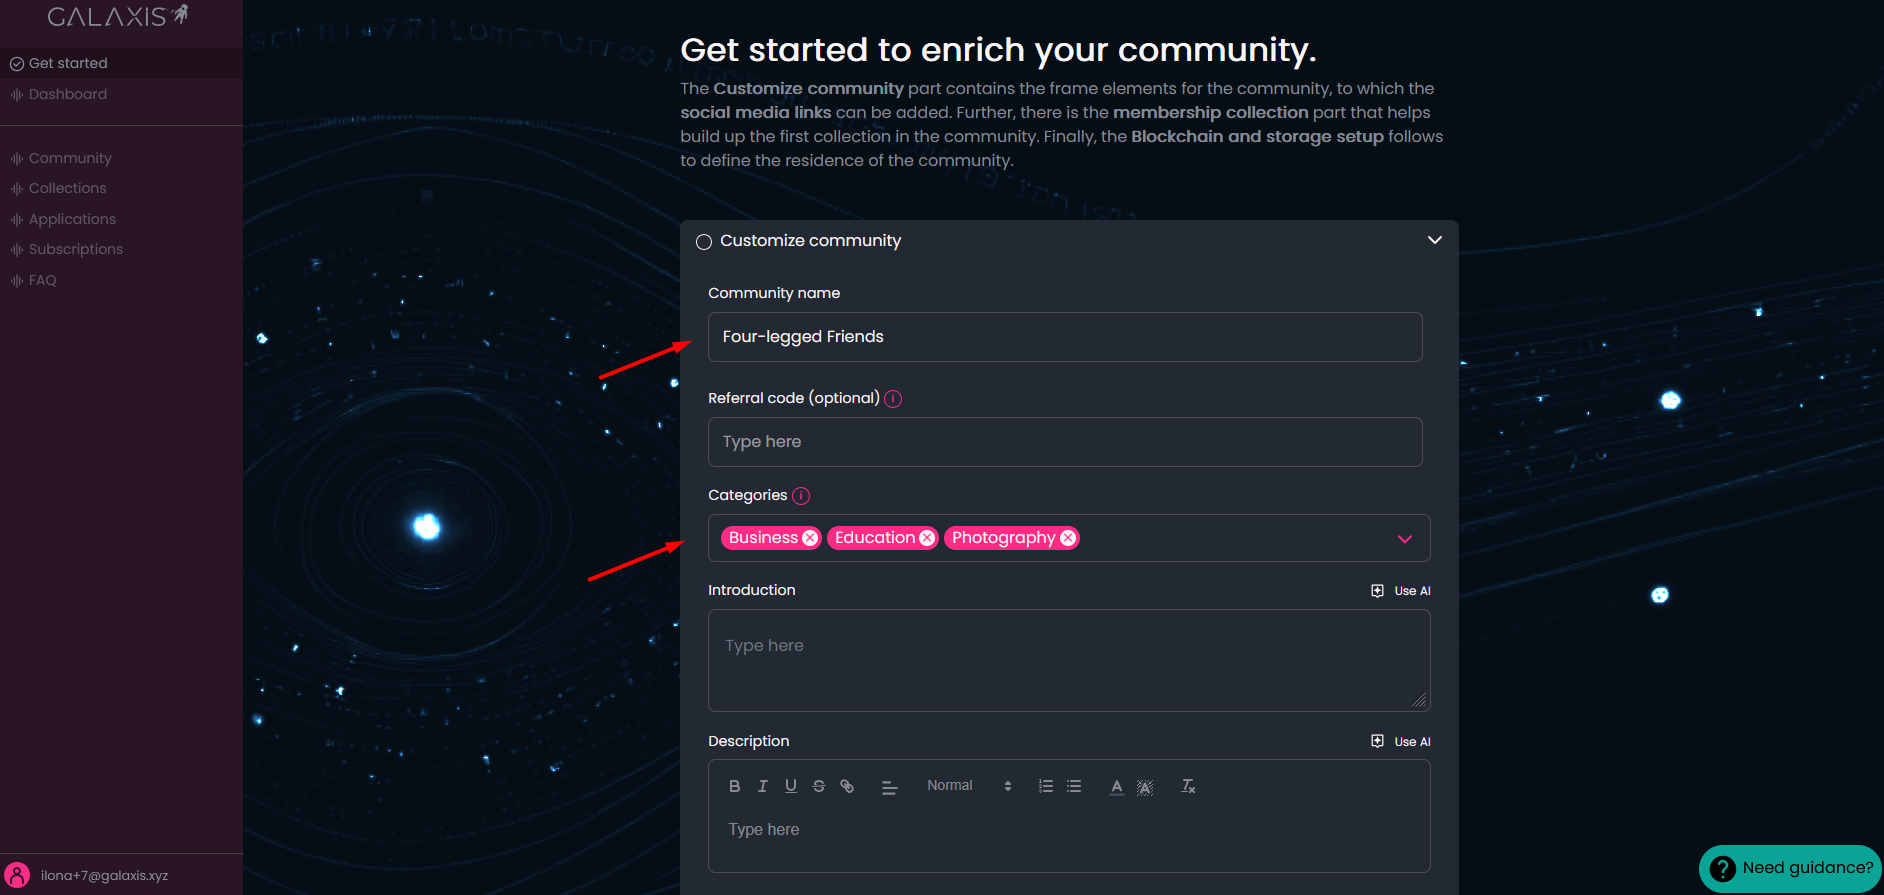
Please complete the missing information like
- Referral code (this is optional)
- Introduction
- Description
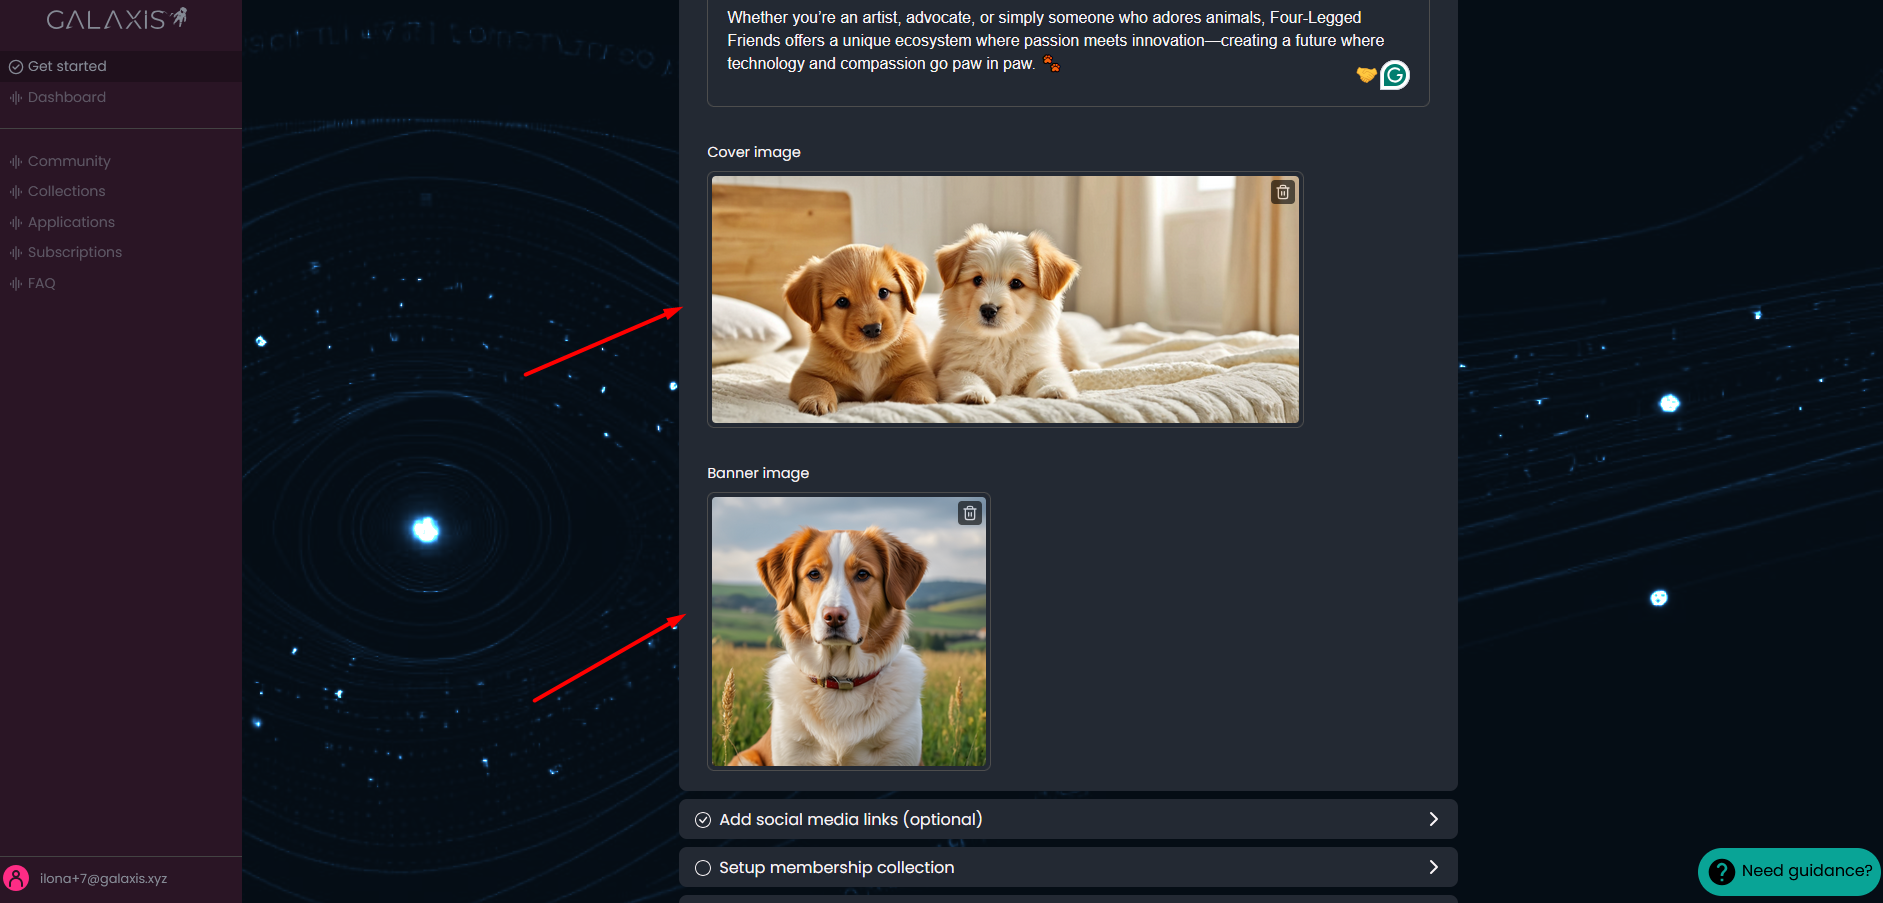
- Cover image
- Banner image
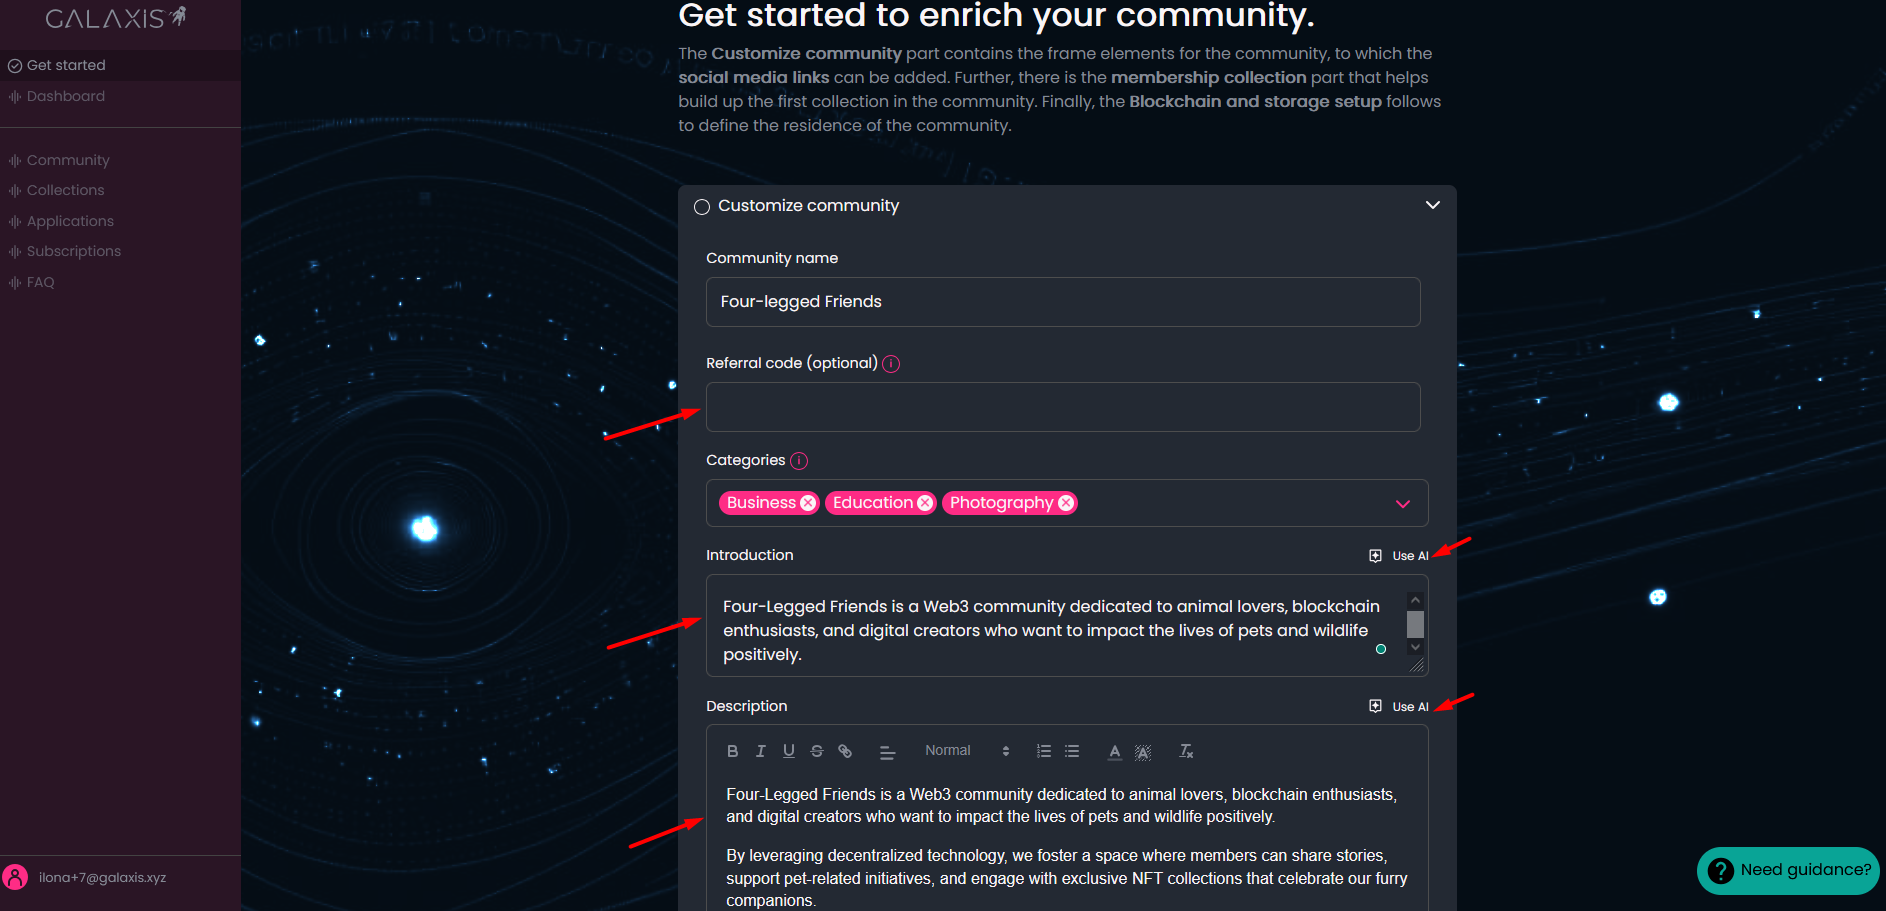
Note:
If you did not prepared exact texts for your community we provide the opportunity to use AI at both the Introduction and Description. We also make it possible for you to generate Cover image and Banner image for the community website with the help of AI.
-
Continue with adding social media links. If you have a Discord-, X, or Facebook user, or dedicated website, do not hesitate to provide them here.
-
For next, make the configuration for the first collection in your community that will be the membership collection:
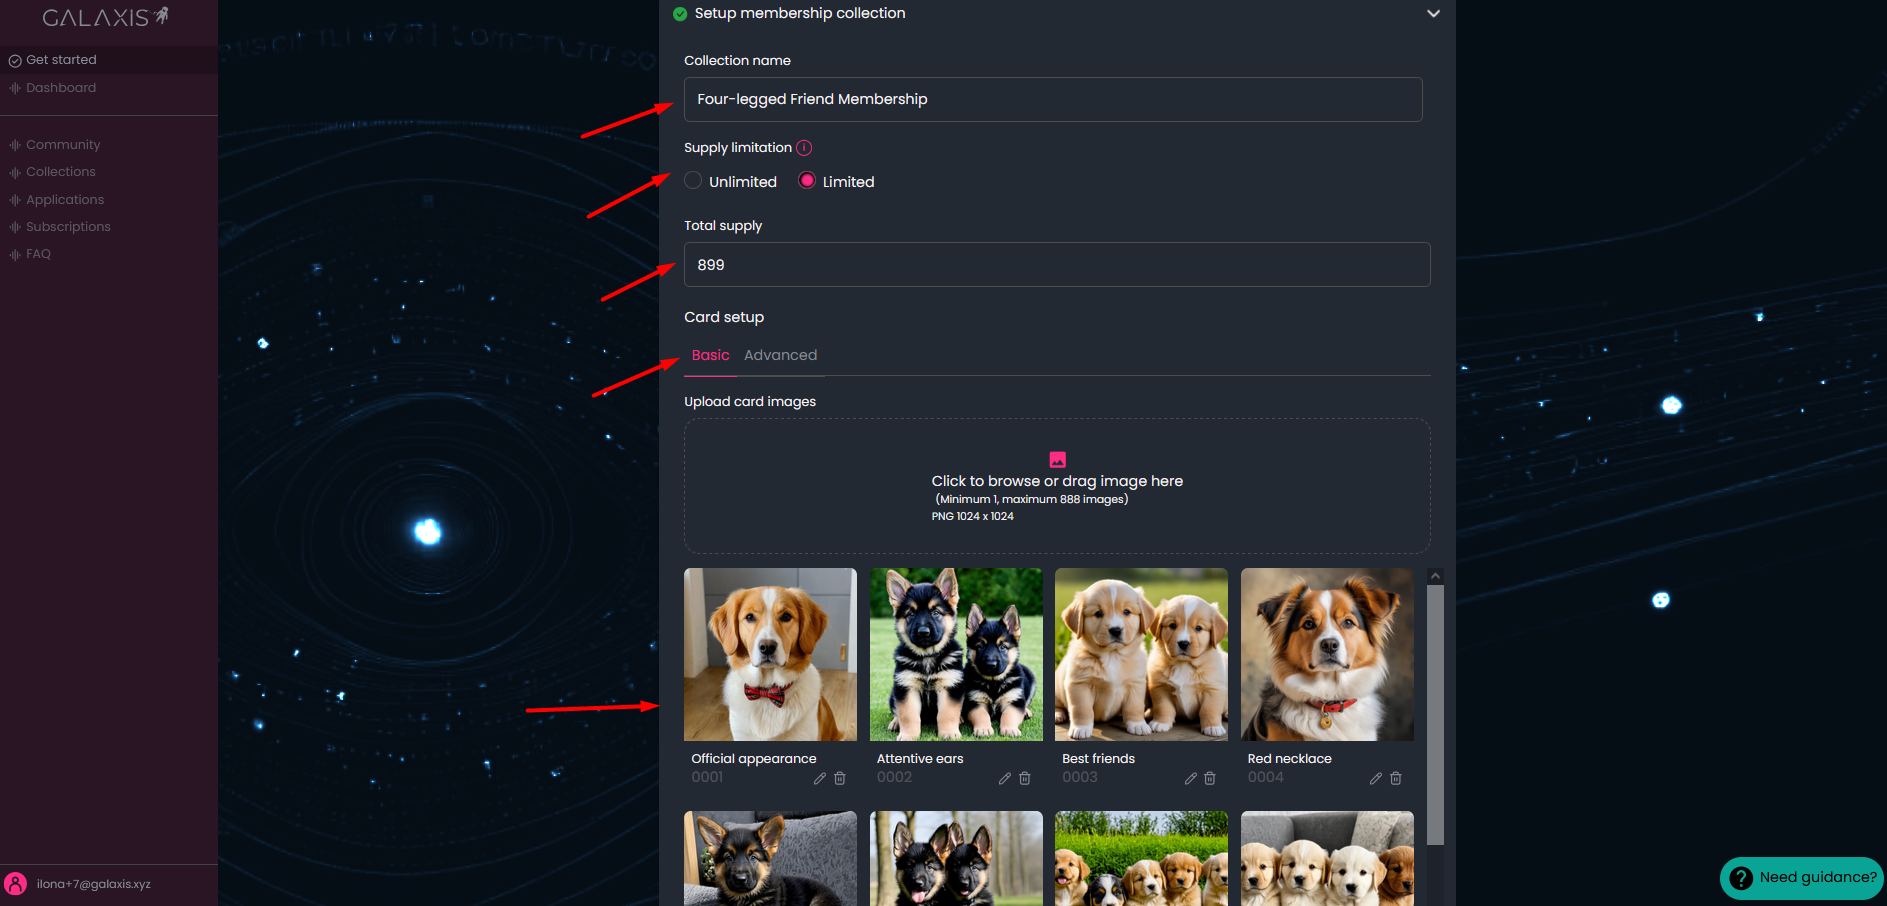
- type in a Collection name
- select the Supply limitation - if you want unlimited card collection or just a limited one. If you opt for the latter, then you have to specify the number of cards - Total supply.
- decide if you go with Basic - or Advanced Card setup.
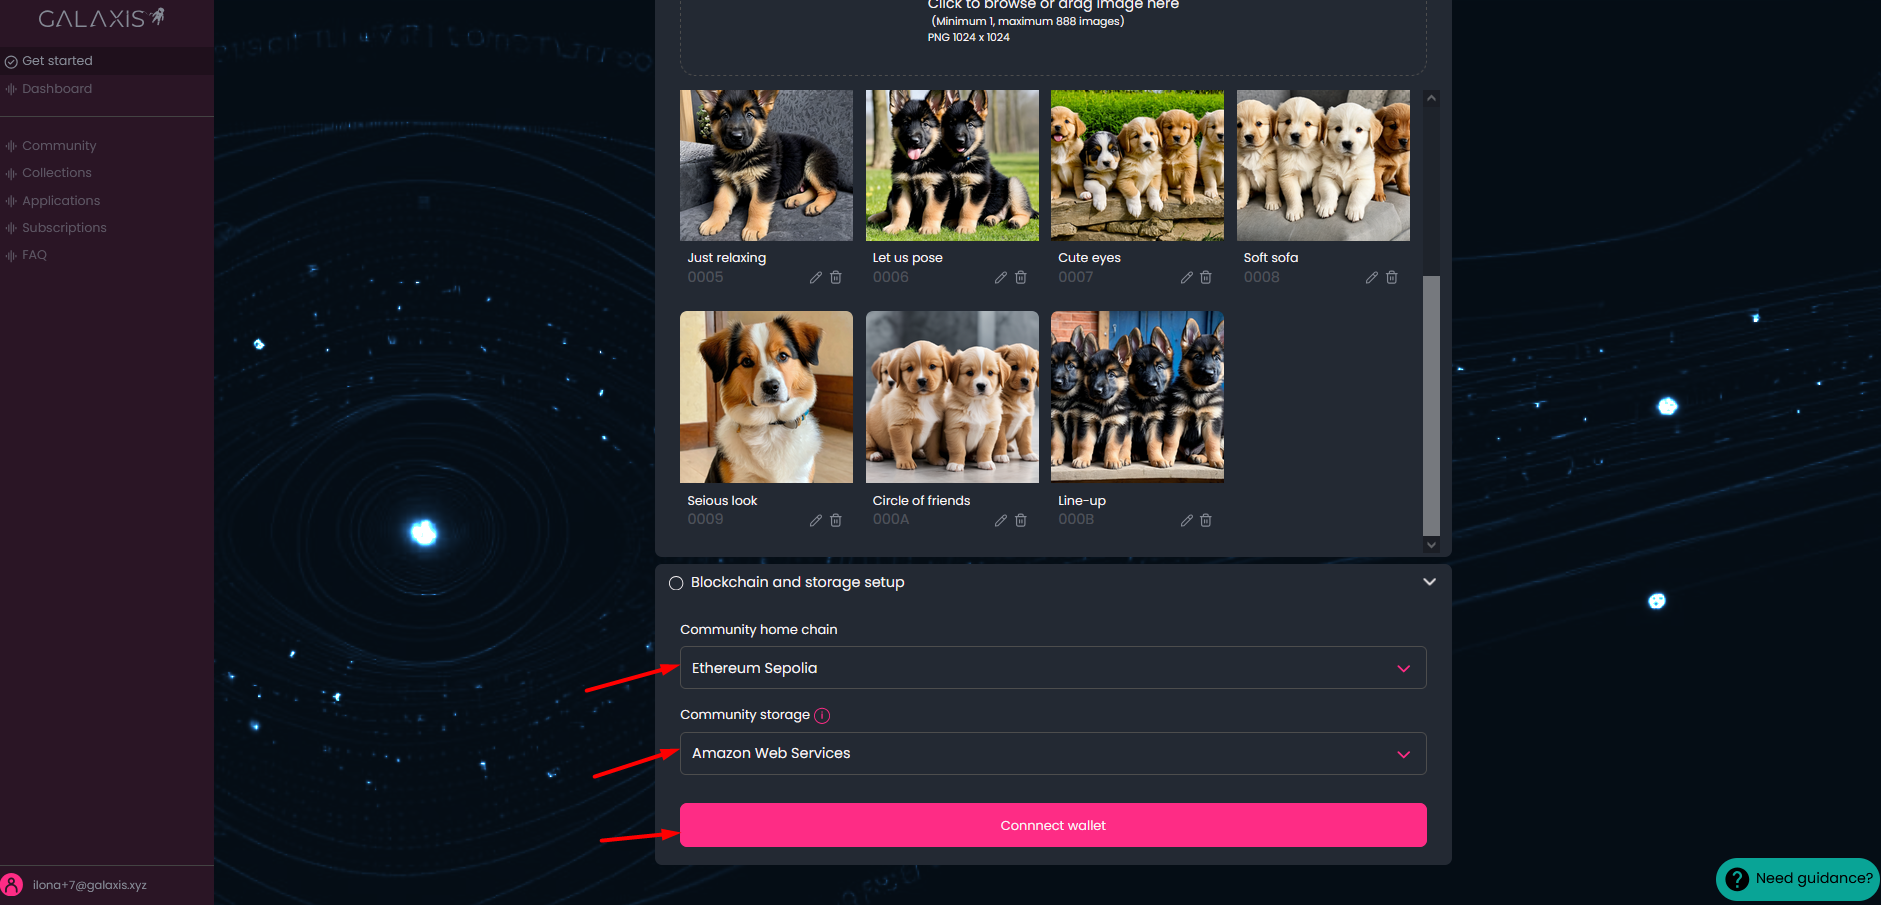
In case of Basic you just Upload images that will be used for the membership cards. You can upload between 1 and maximum 10,000 images in case of an unlimited collection, and between 1 and maximum the number of total supply images in case of limited collection.
Note: We recommend to name the images nicely in a descriptive way, because the image file names will be visible on the community website. So it is much nicer to have an image about two smiling persons named as "Best Friends.png" than to have a file name like this: "1026500.png"
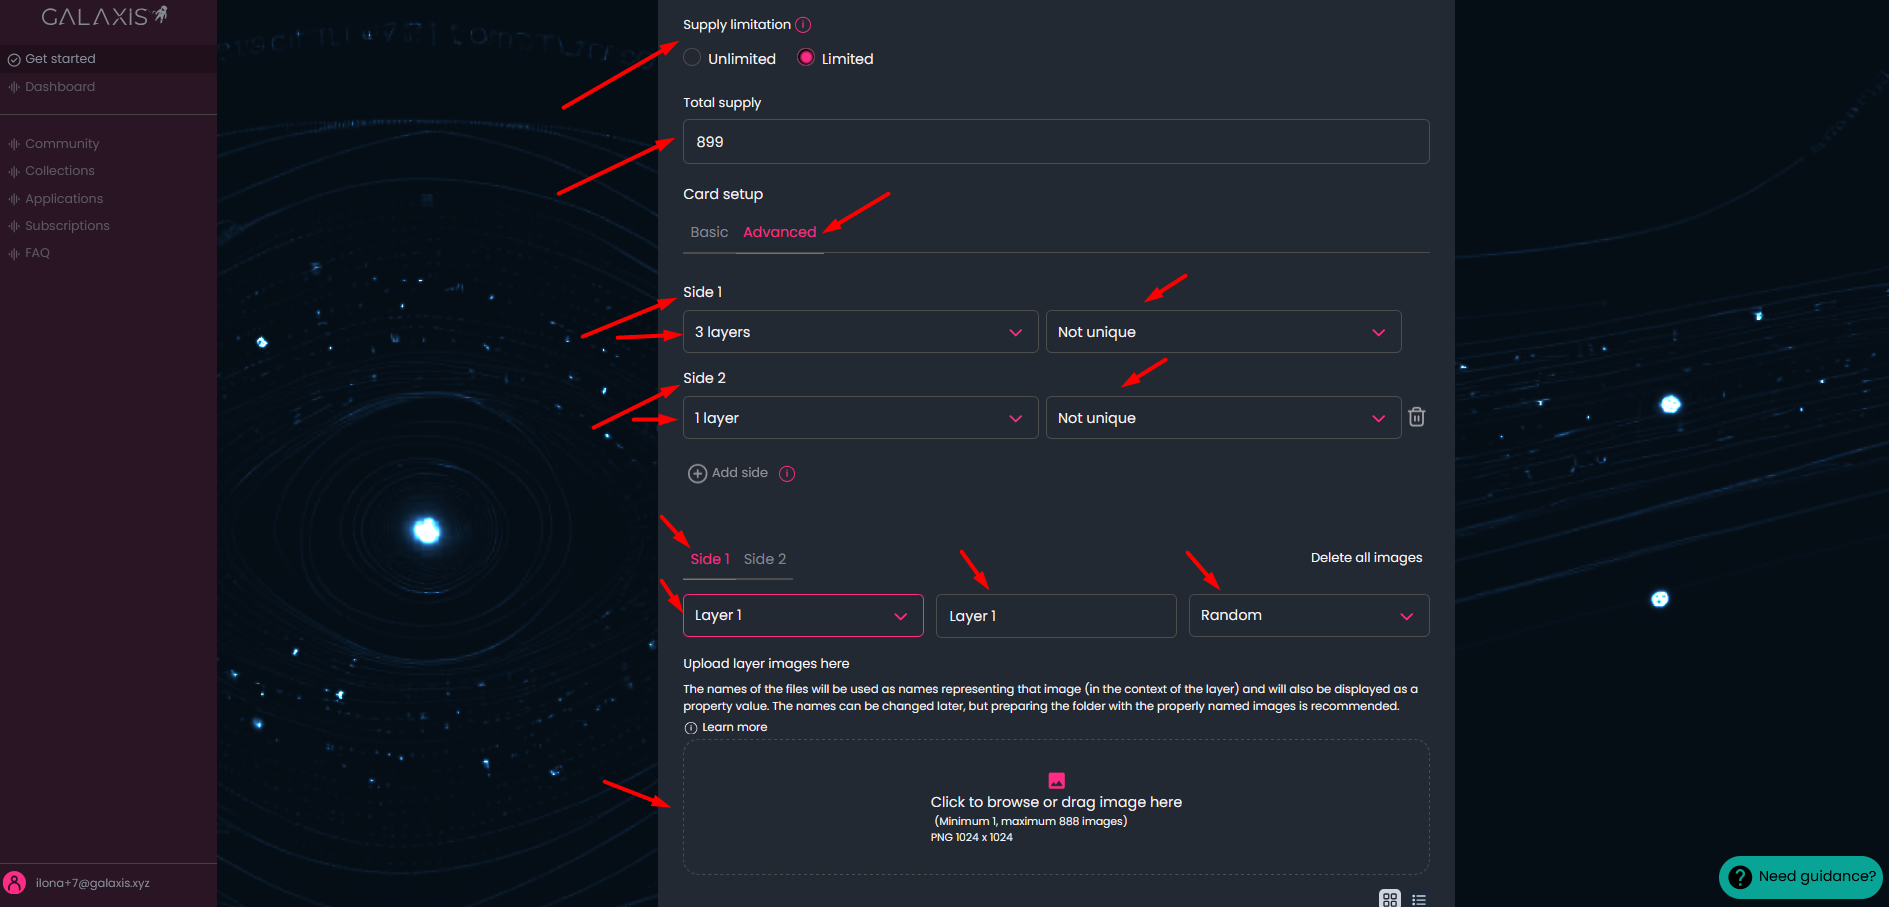
In case of Advanced card setup you can handle everything from uploading images, creating layers, combinations, managing rarities, etc. to build more sided cards.
Add your assets to the collection:
-
Set the sides and layers of your collectibles
- Click on the “Add side” button to add more sides. At the moment you can create two-sided cards. -
Select the layer numbers for each side. For example the first side of the card can have three layers, meaning that the Layer 1 image will be at the bottom, and Layer 2 image will be placed on the top of Layer 1 image, and Layer 3 image on the top of Layer 2 image. You can have a side composed from maximum 10 layers.
Note: You can also set the image of a side to be unique or not. If you opt for a unique image for a side, make sure to upload the appropriate number of layer images, so that the mathematical possibility of unique image generation to be valid. -
Upload images for each side and layer
- Select the side and the layer where you want to upload the assets.
- Edit the layer name
- Set distribution type for each layer (random distribution is set by default, but you can choose even distribution - meaning that the uploaded layer images will be distributed evenly across the collection, and you can opt for manual distribution - meaning that you can define exactly for each layer image how many times to appear across the collection.)
Here is an explanatory video about how the layers allign to create an image for a side.
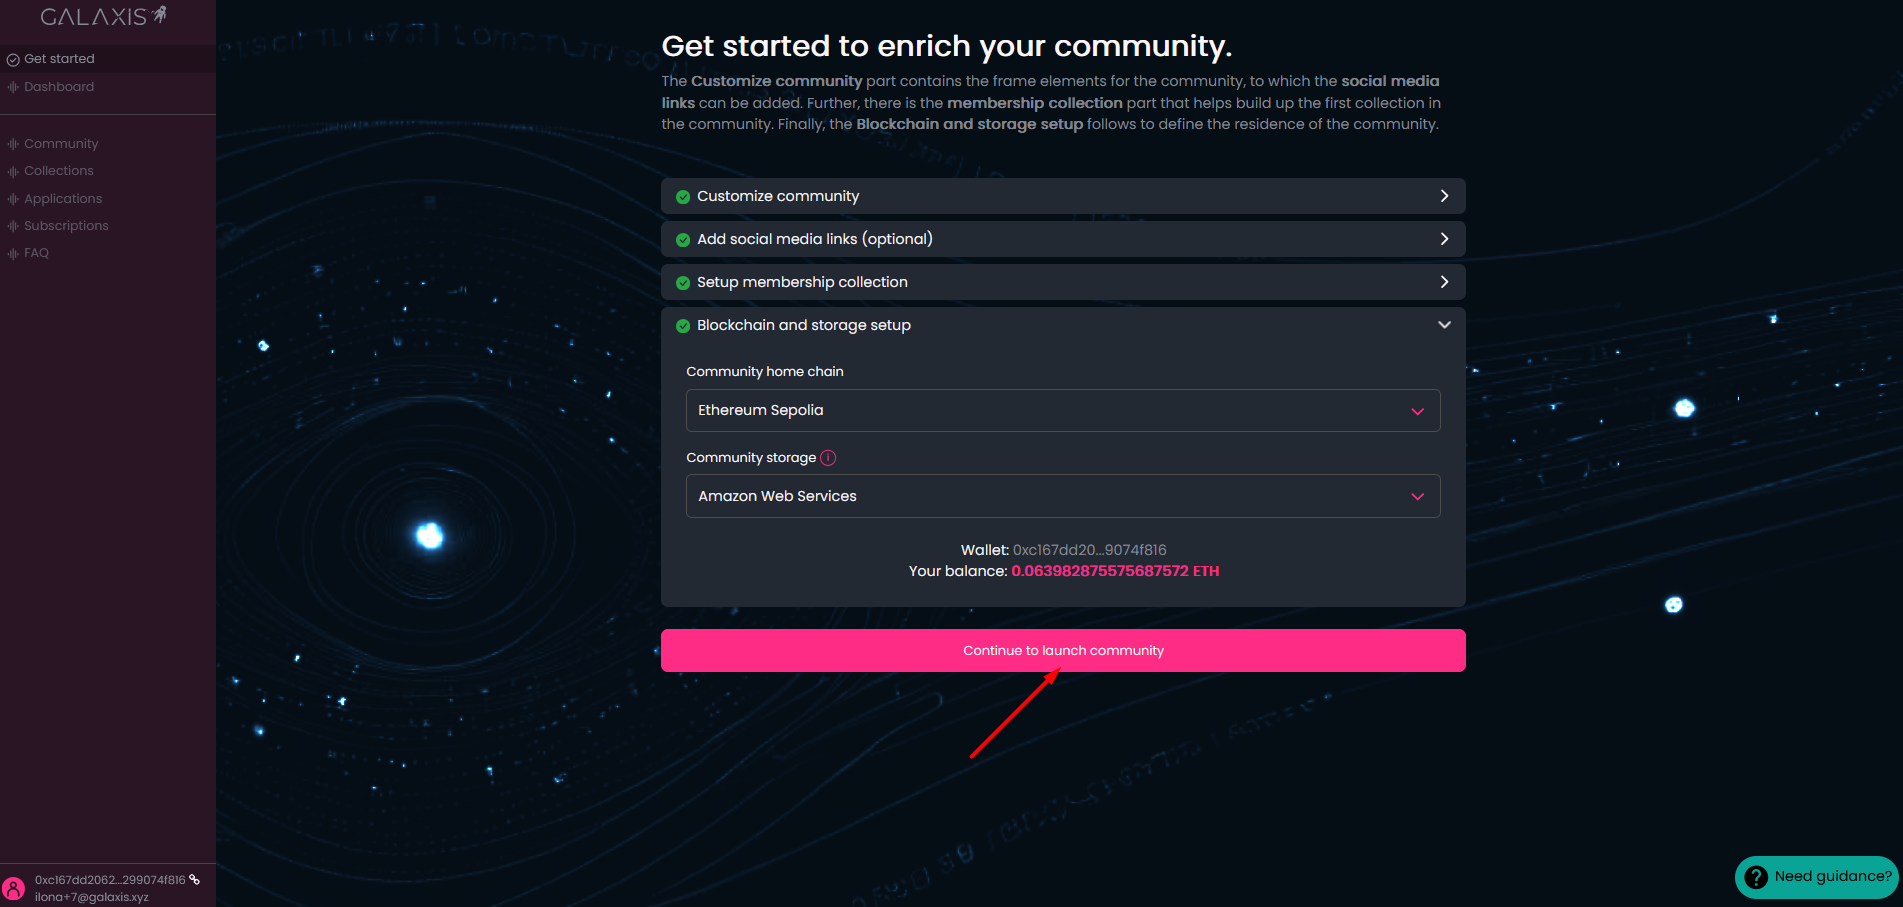
- If you registered with crypto wallet then you can see here your linked wallet address and you can change the Community home change and Coomunity storage settings.
If you started building your community after registering with e-mail, then at this point you need to deal with Blockchain and storage setup. Please select a home blockchain from the list for your Web3 community and select also where you want to store your community data: Amazon Web Services (AWS) or Swarm. AWS is free of charge, while Swarm storage is only free for the first period, after that it has to be paid by the community owner.
Therefore, we recommend the use of AWS.
Before starting your Web3 journey, you will need a crypto wallet.
You can find the list of wallets here. Your wallet is your identity card, no one else can sign any document with your signature (as long as you keep it safe). If you have no preference, we recommend using MetaMask, a simple add-on you can install for your browser. Once installed, connect your wallet.
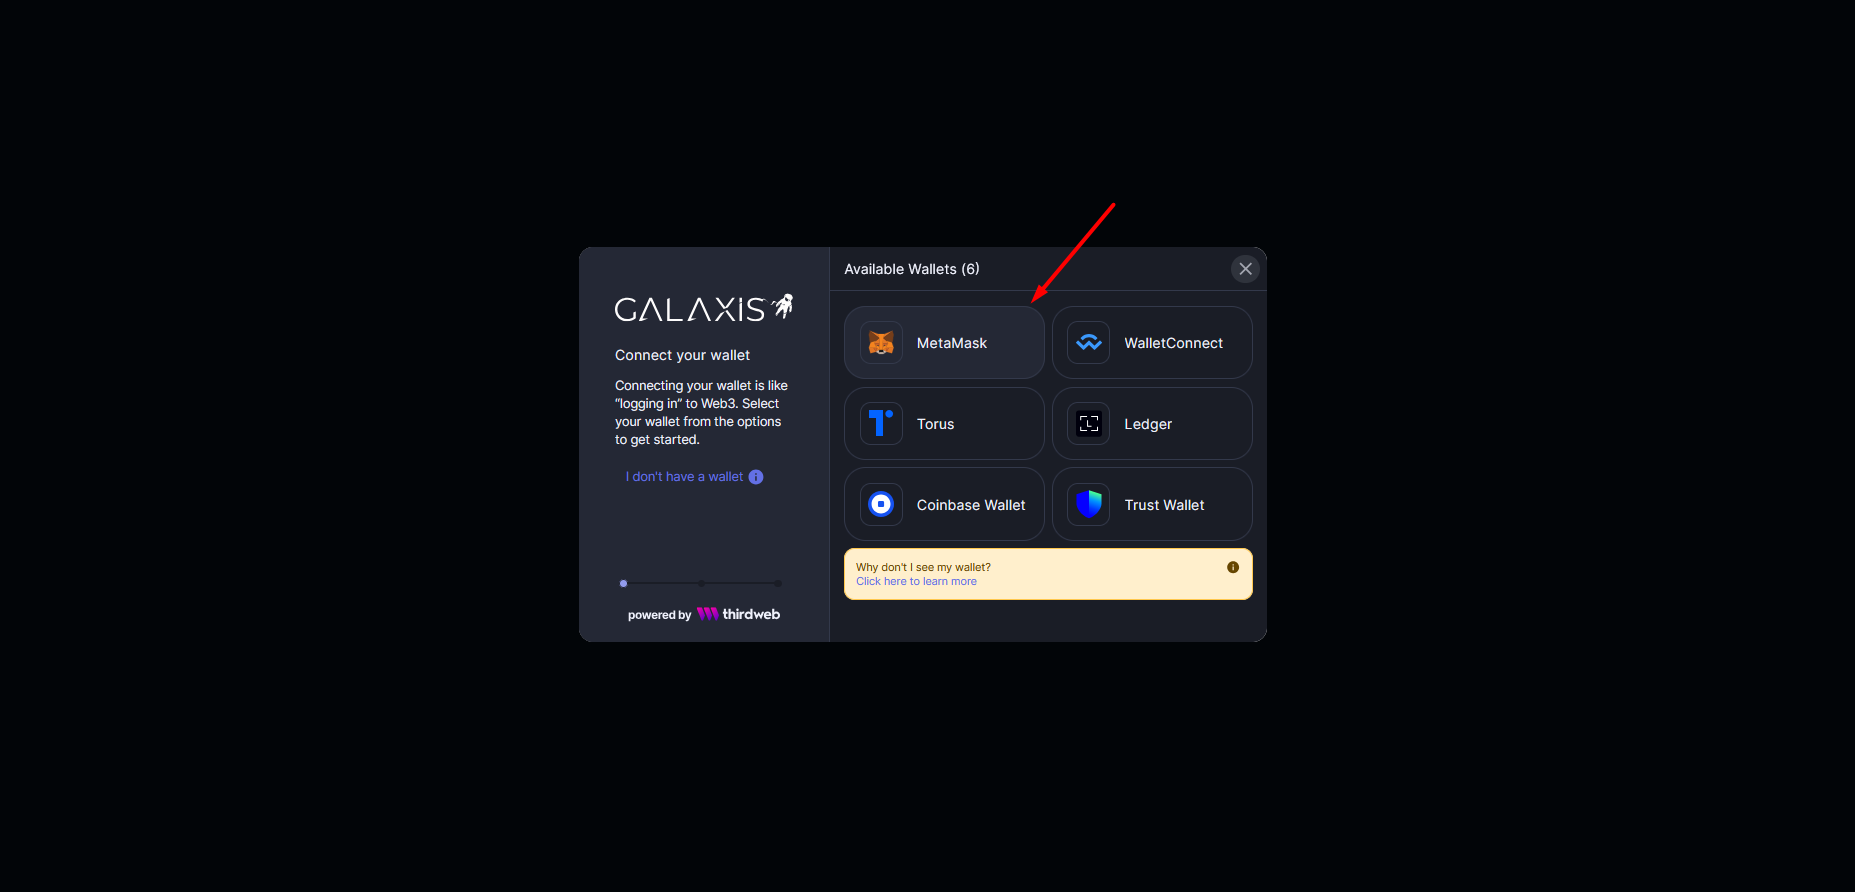
After that link your wallet to your account. Do not forget to buy a little amount of crypto in the currency of your target chain.
When linking your wallet, you will have to fulfill a signature request. Click on Confirm in your wallet.

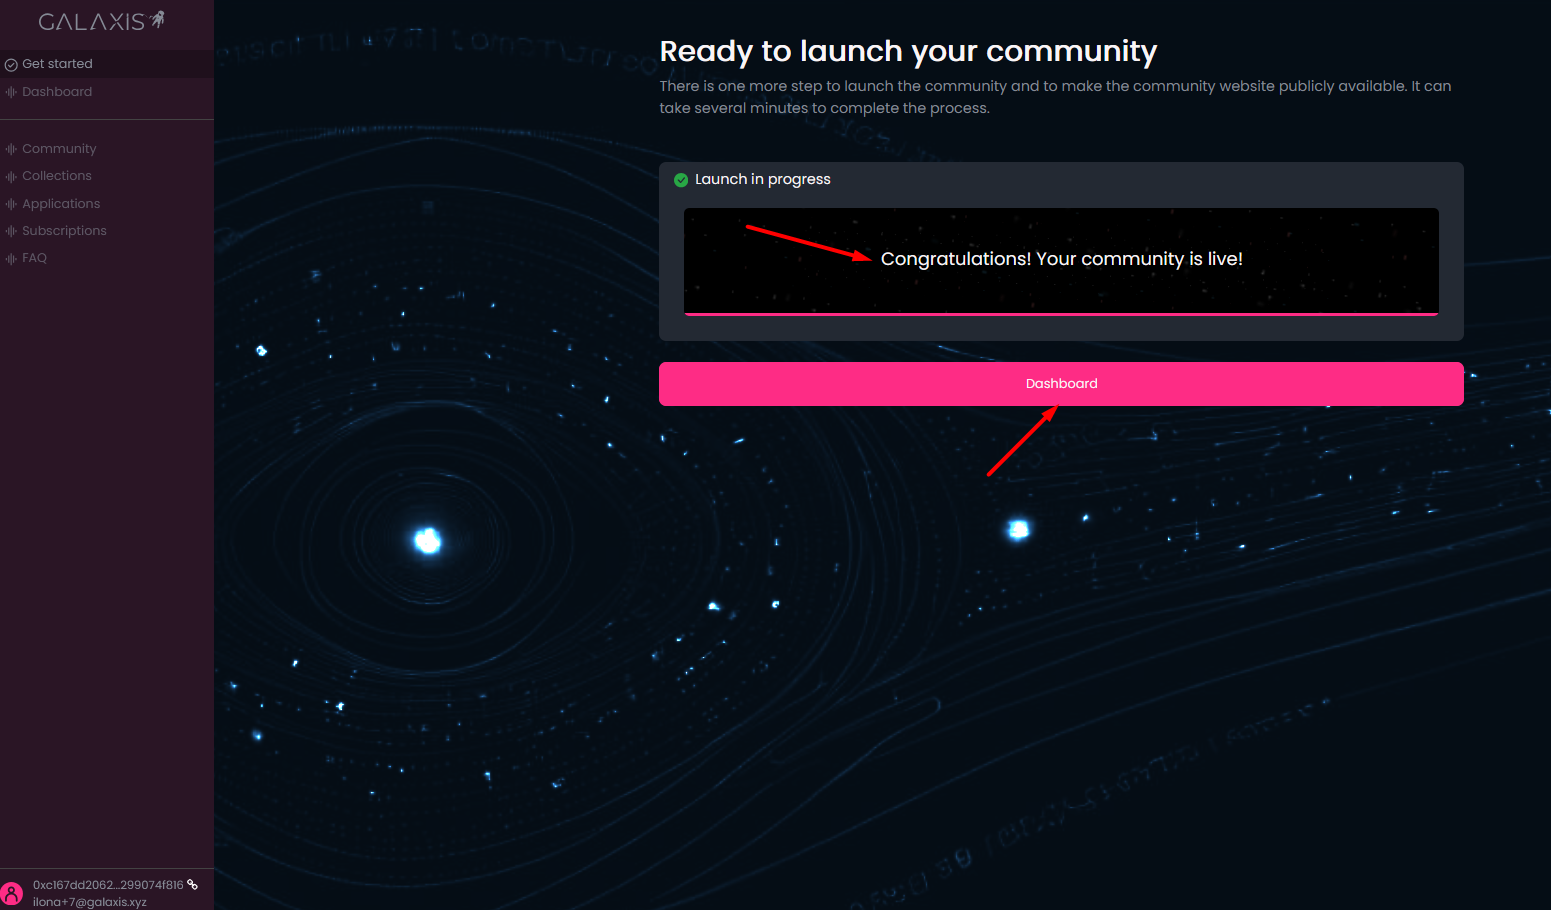
- This is the point when you start launching your community.
You have to confirm your intention by clicking on the Launch community button.
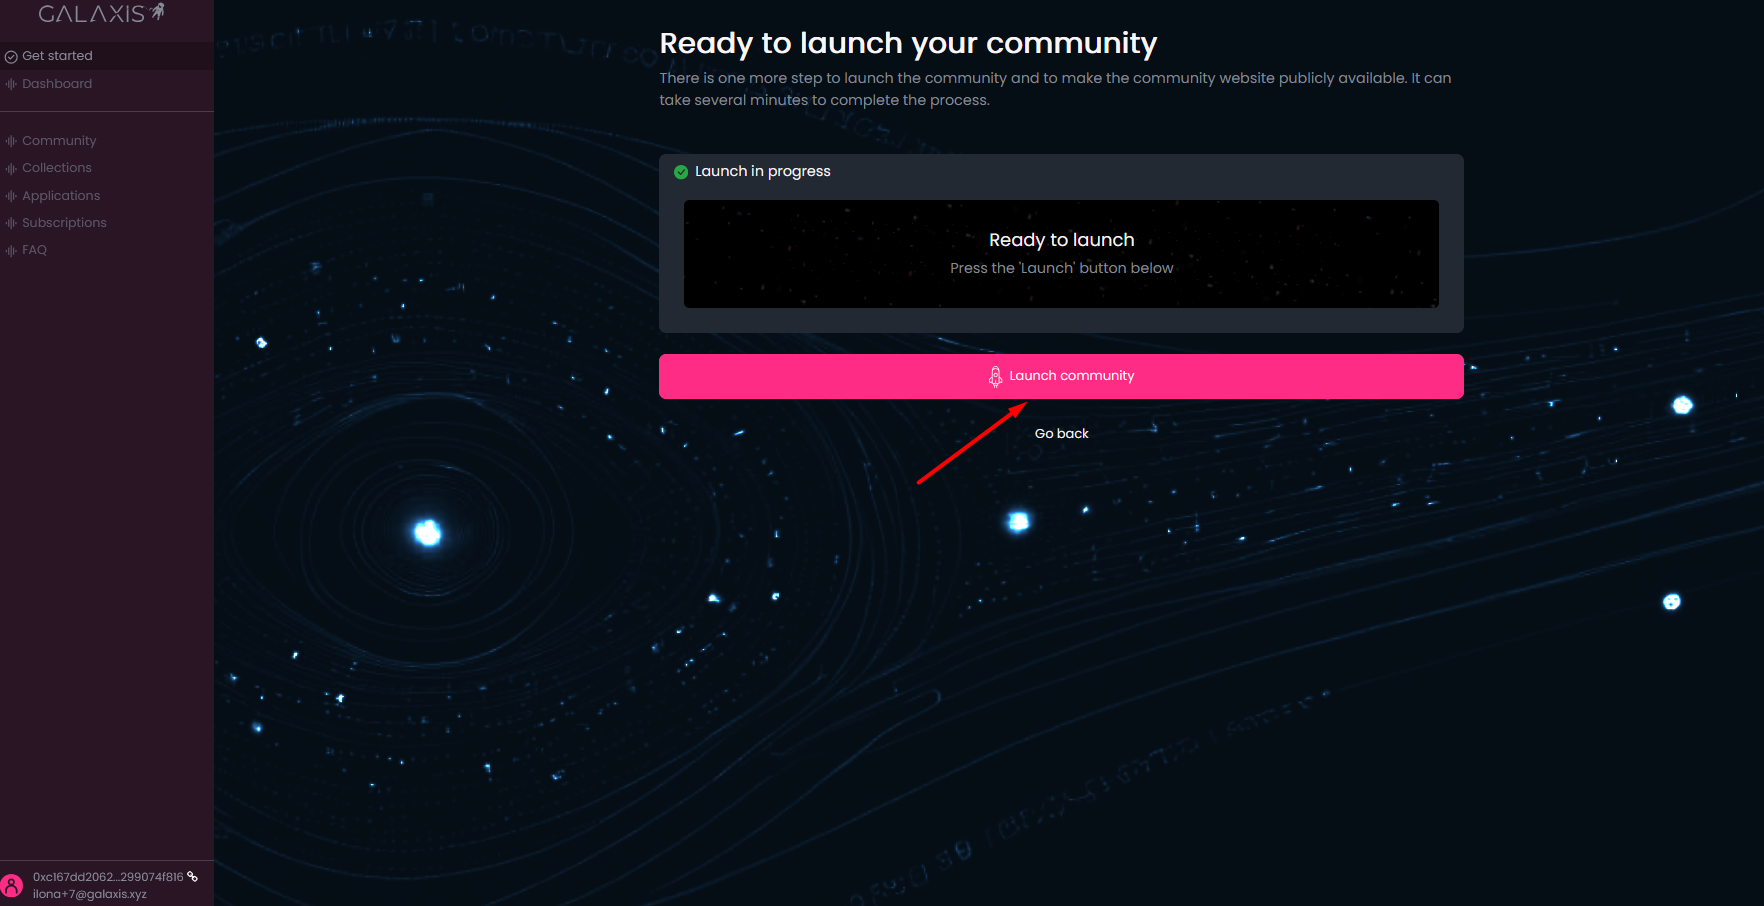
After that you will also have to confirm the transaction in your wallet and pay the gas fees.
The launching process has begun - you are able to see how the progress bar advances and also can see the description of the actually running part process.
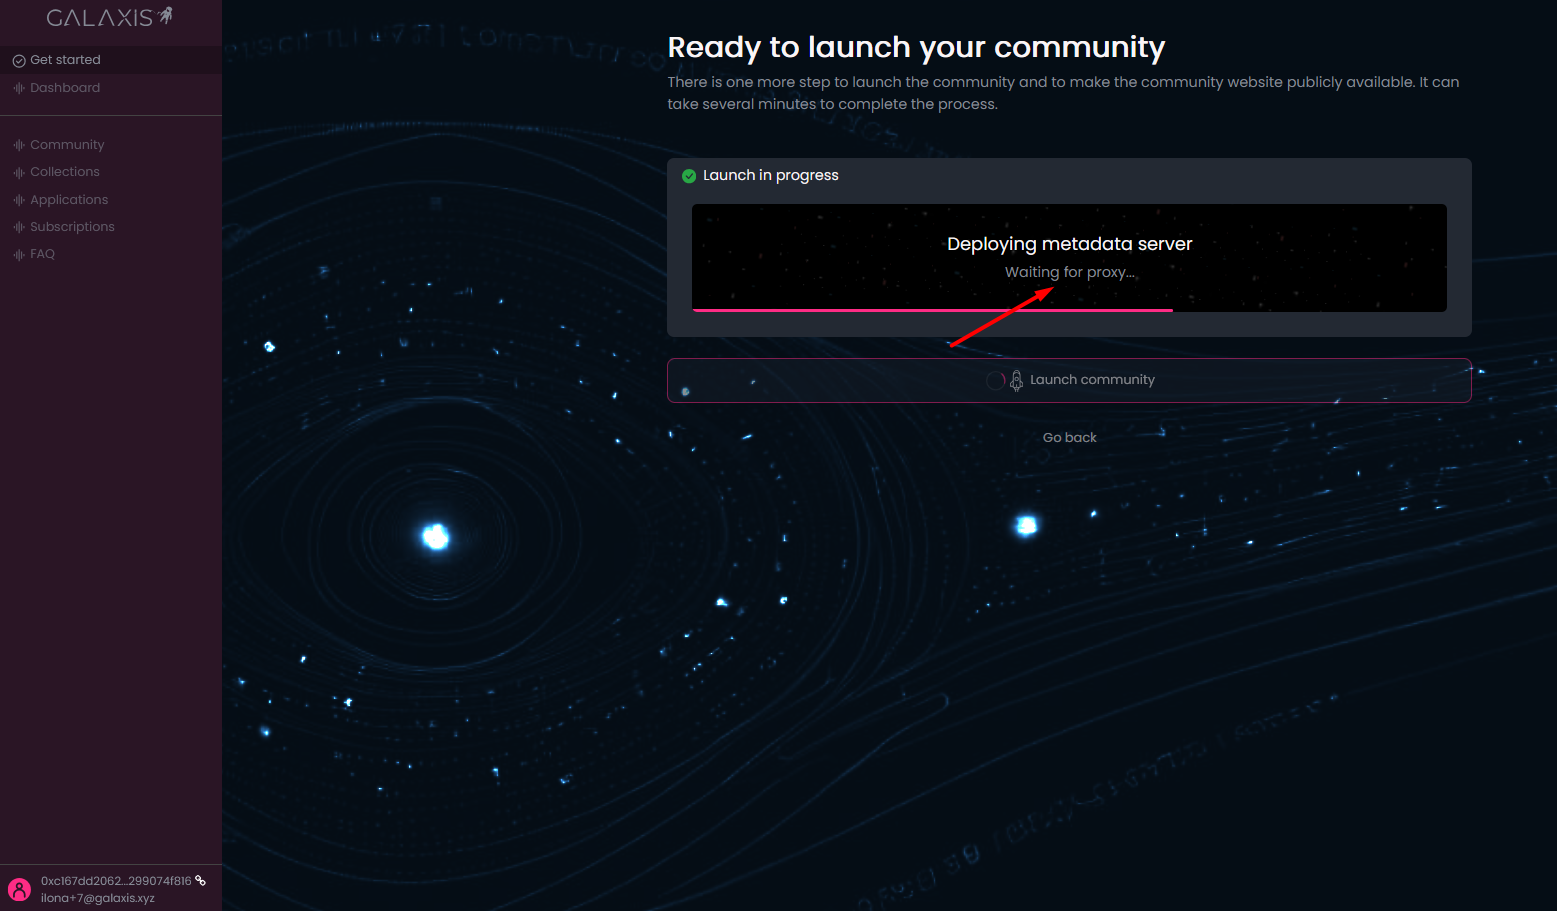
The community website will be created and the appropriate data will be written on blockchain - when the contracts are deployed, you will have to confirm a transaction once again in your wallet.
¶ The result
Congratulations! Your community website is published and the potential community members who visit the website can mint membership cards for themselves.
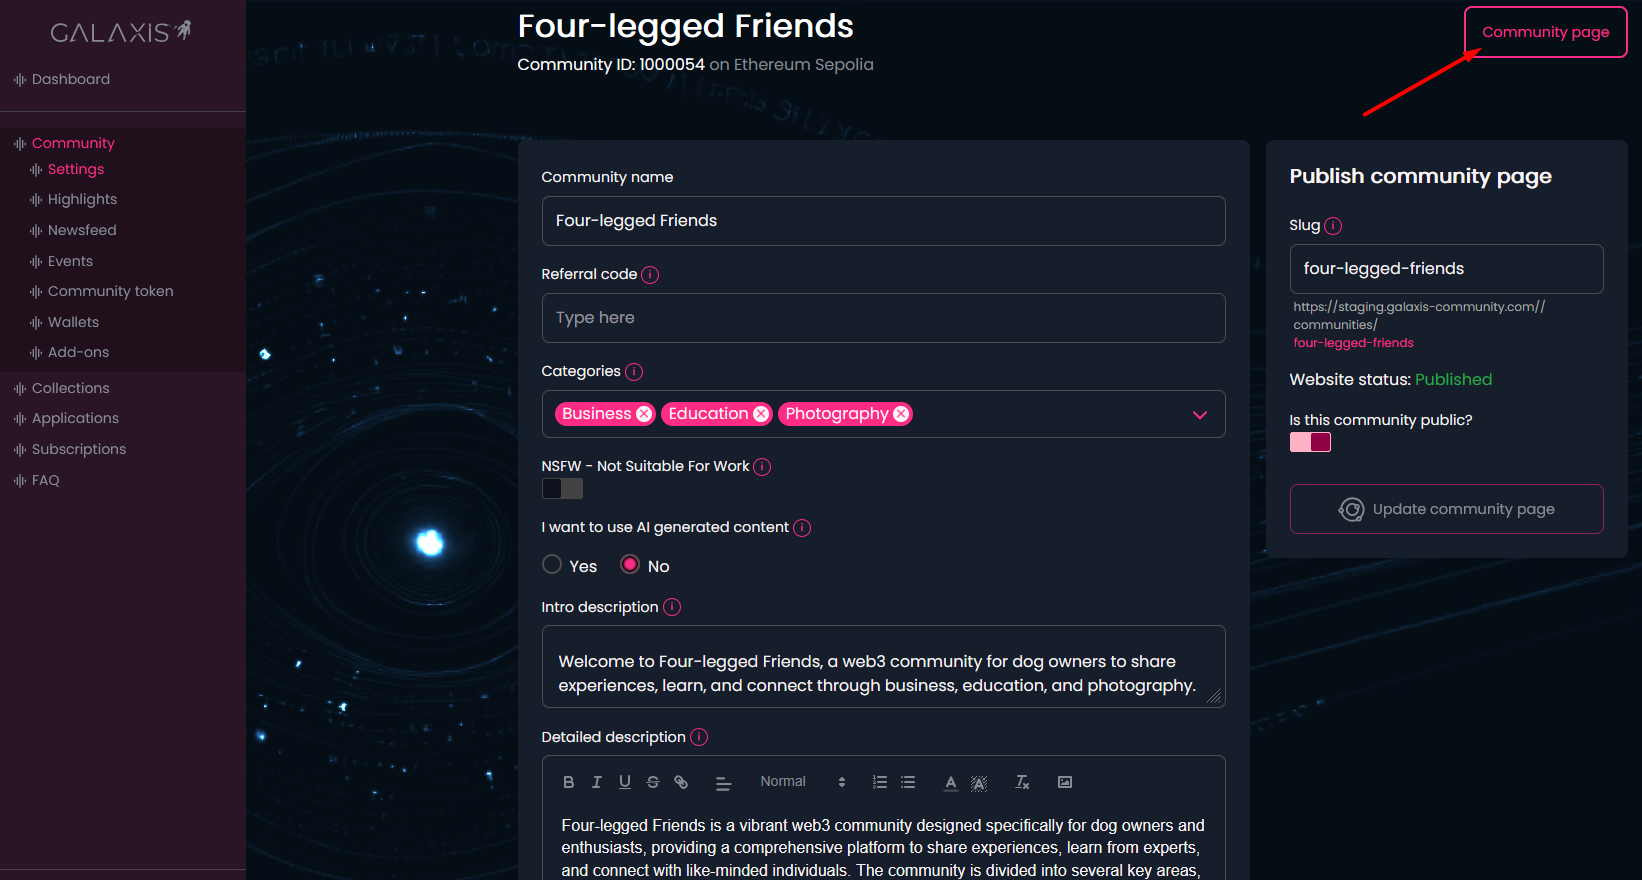
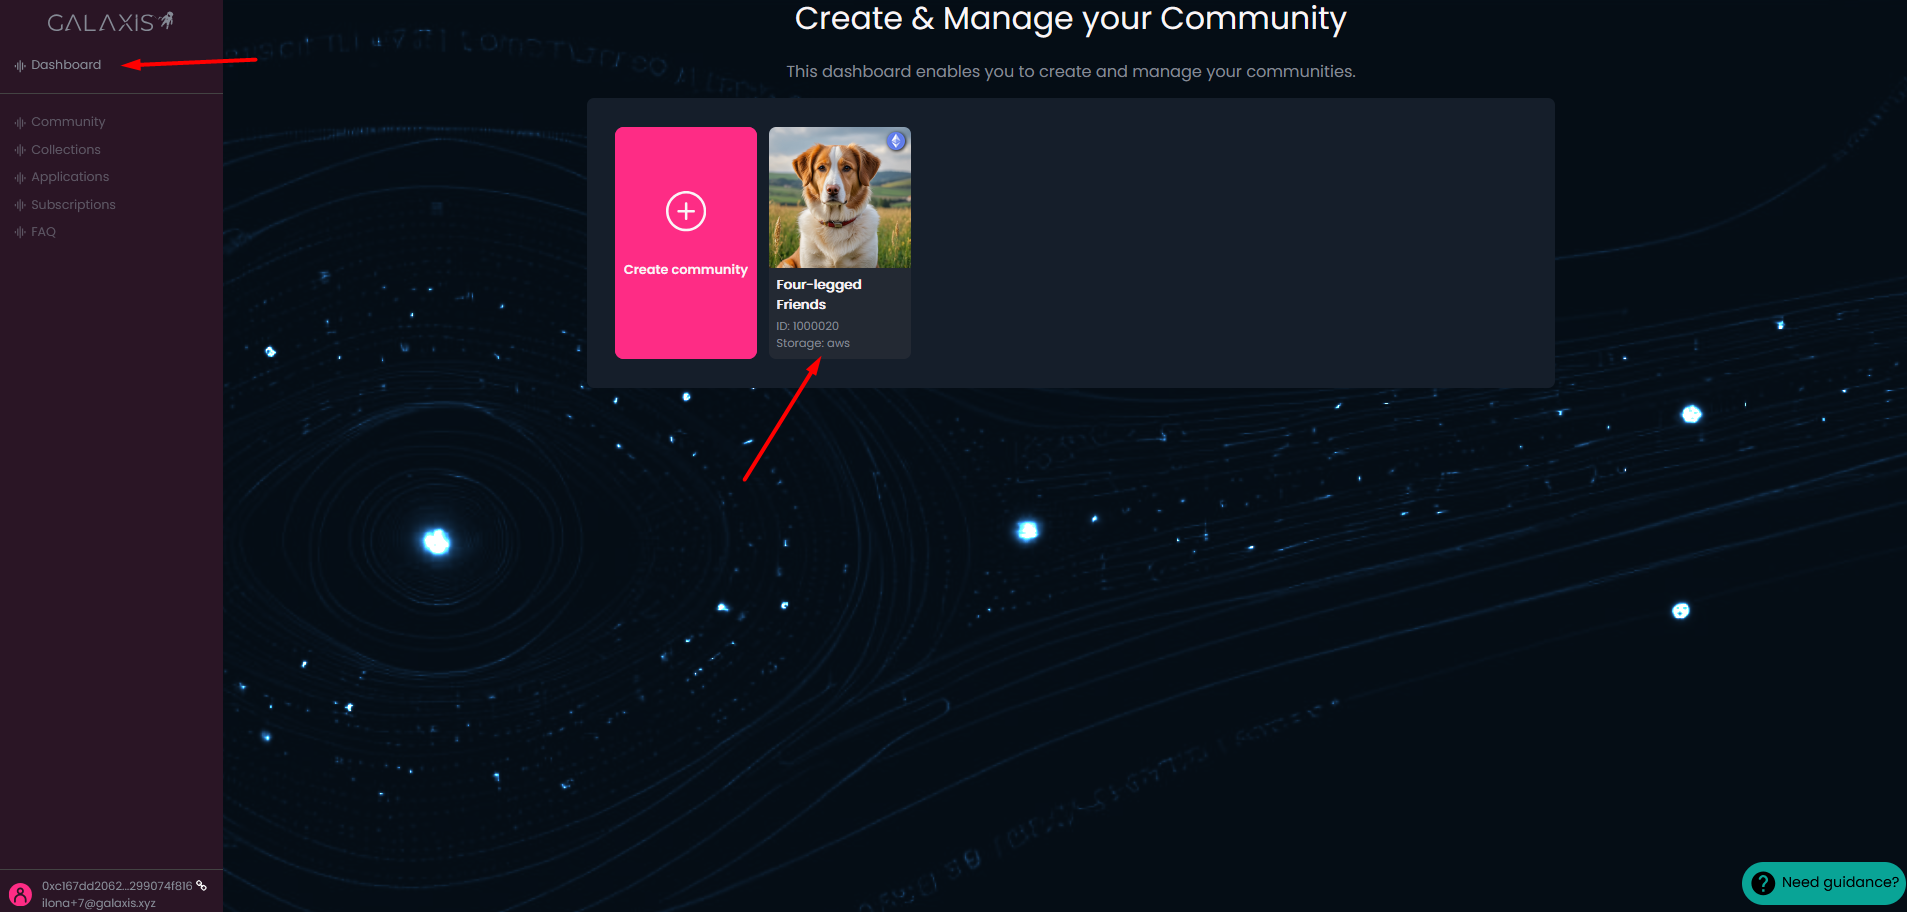
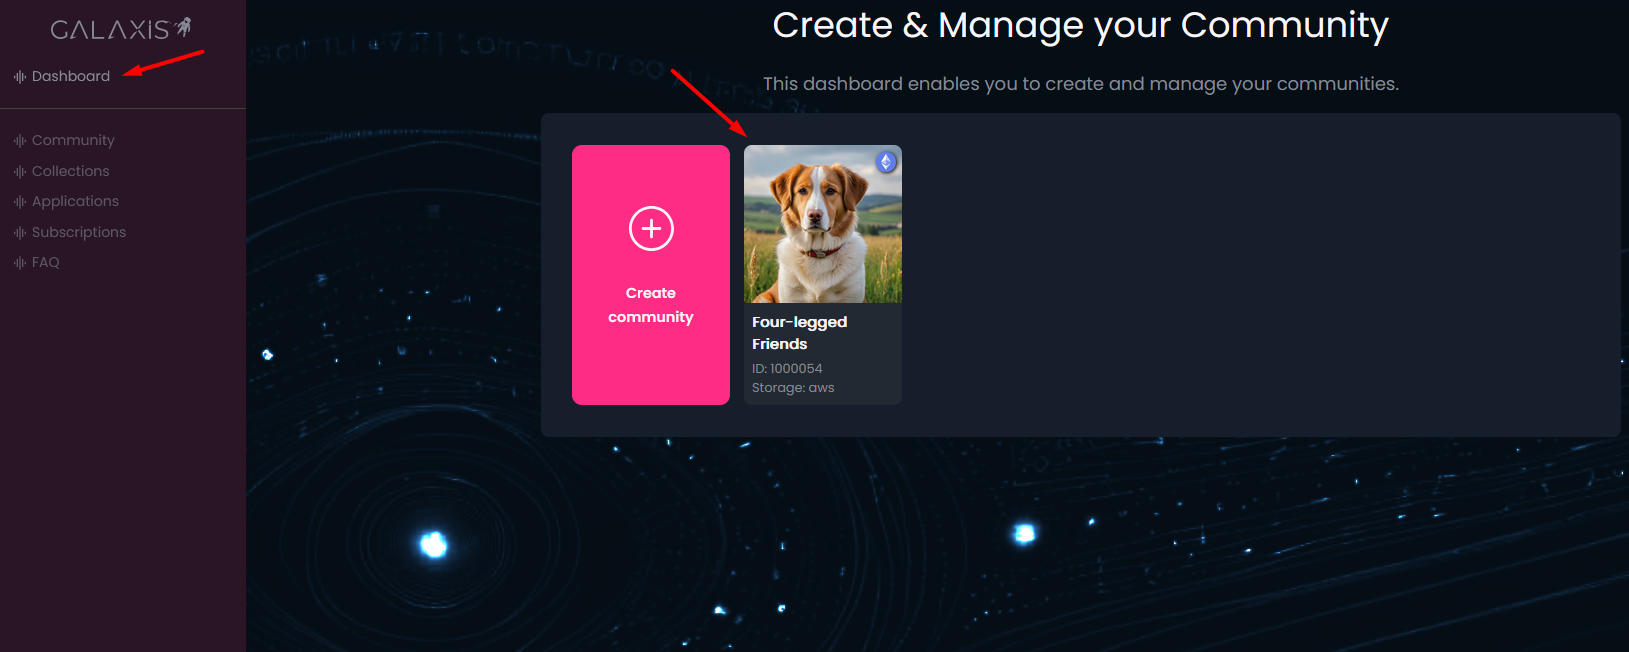
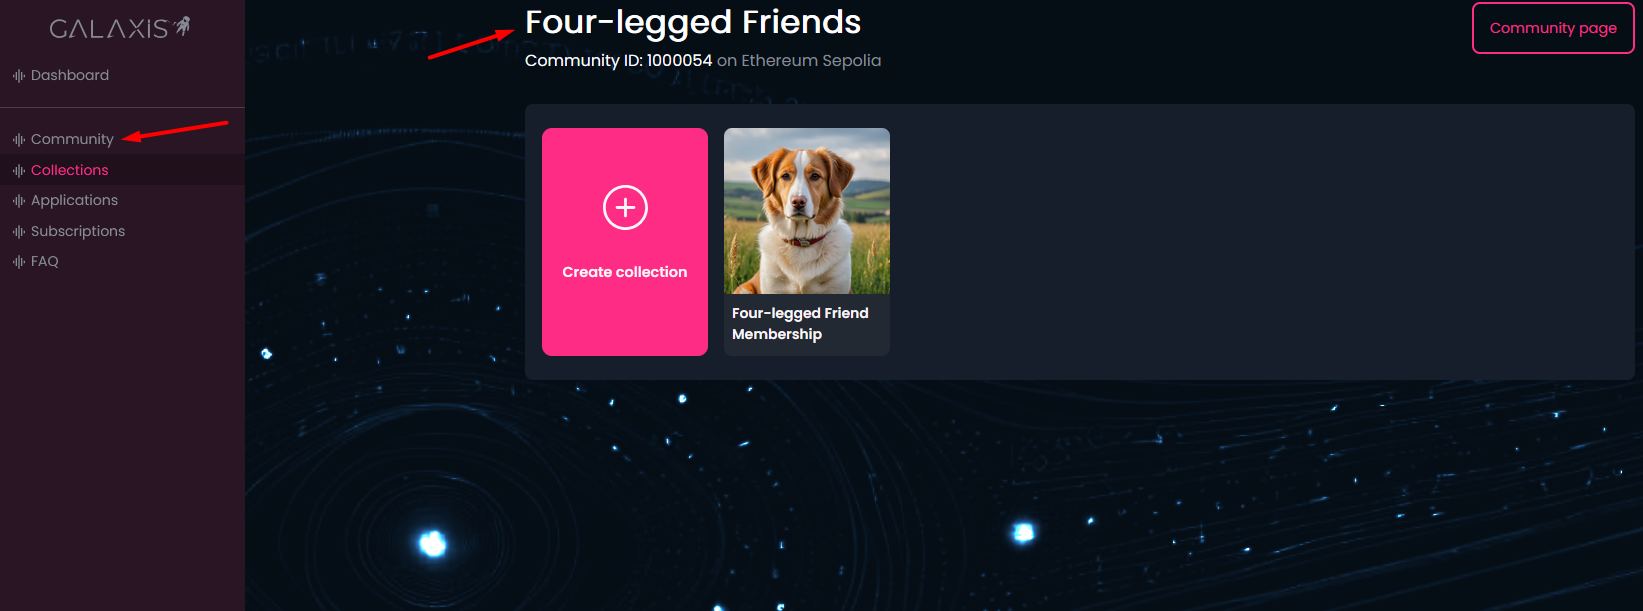
You can visit the Dashboard, click on your freshly created community card and
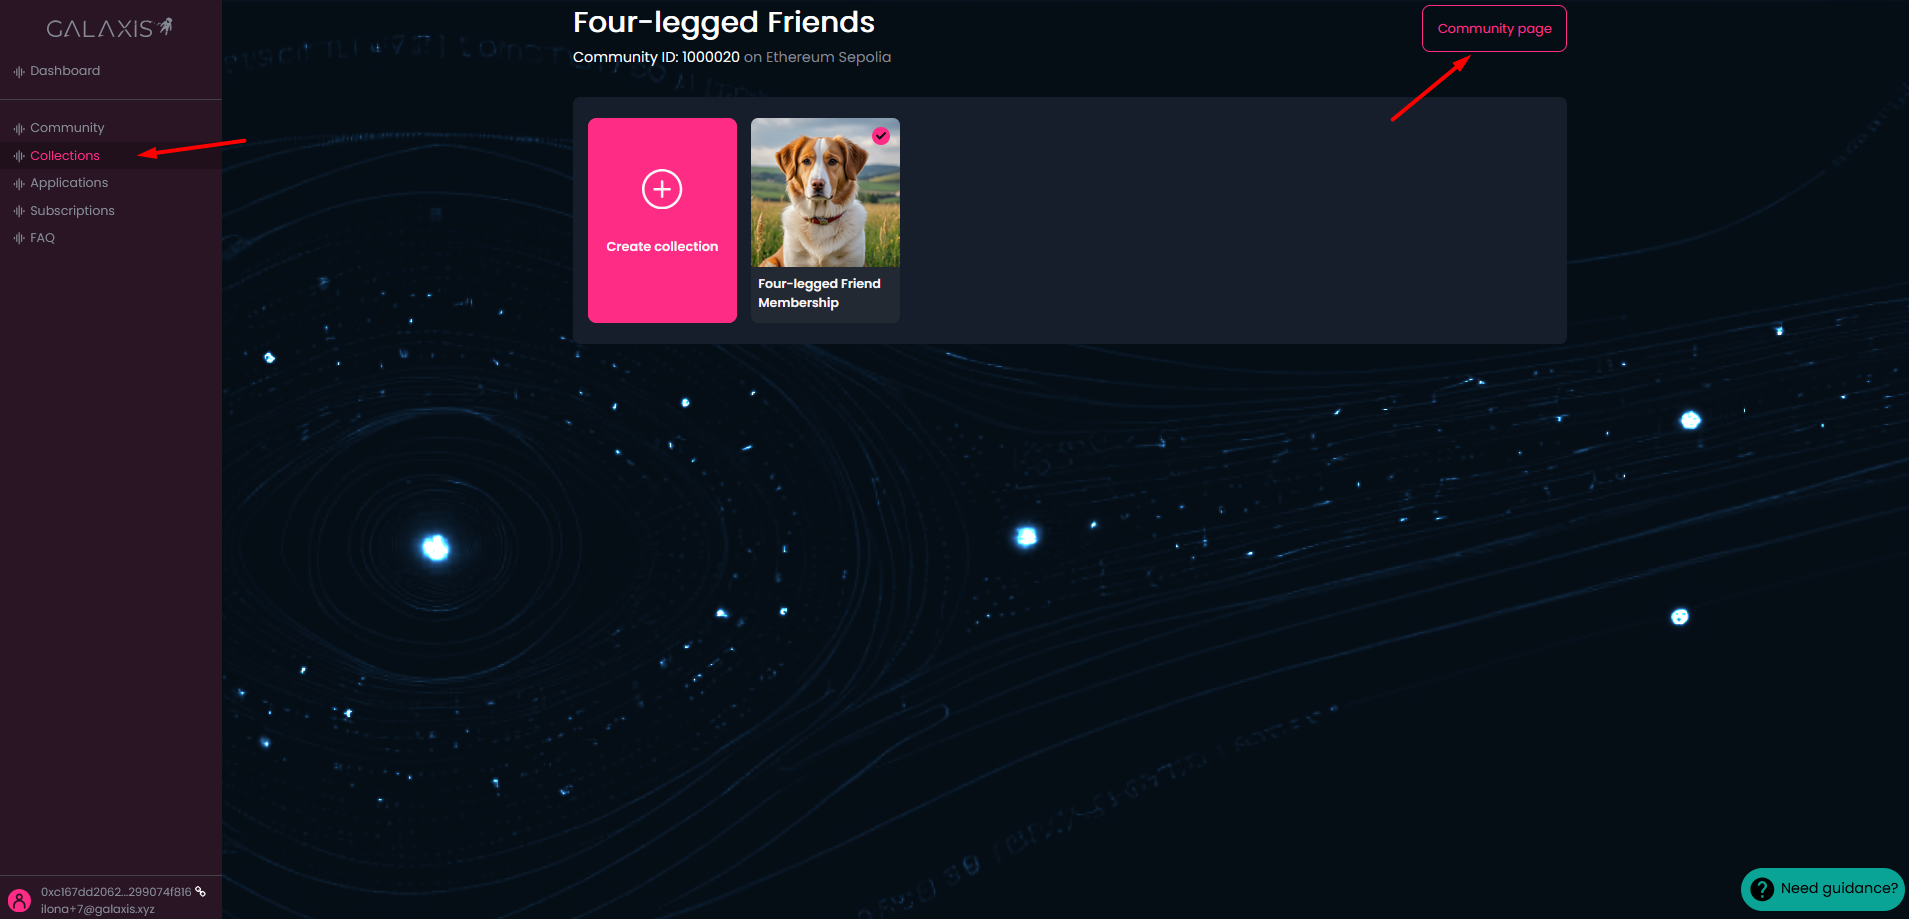
you can access the Community website by clicking on the Community page on the top-right corner of the page.
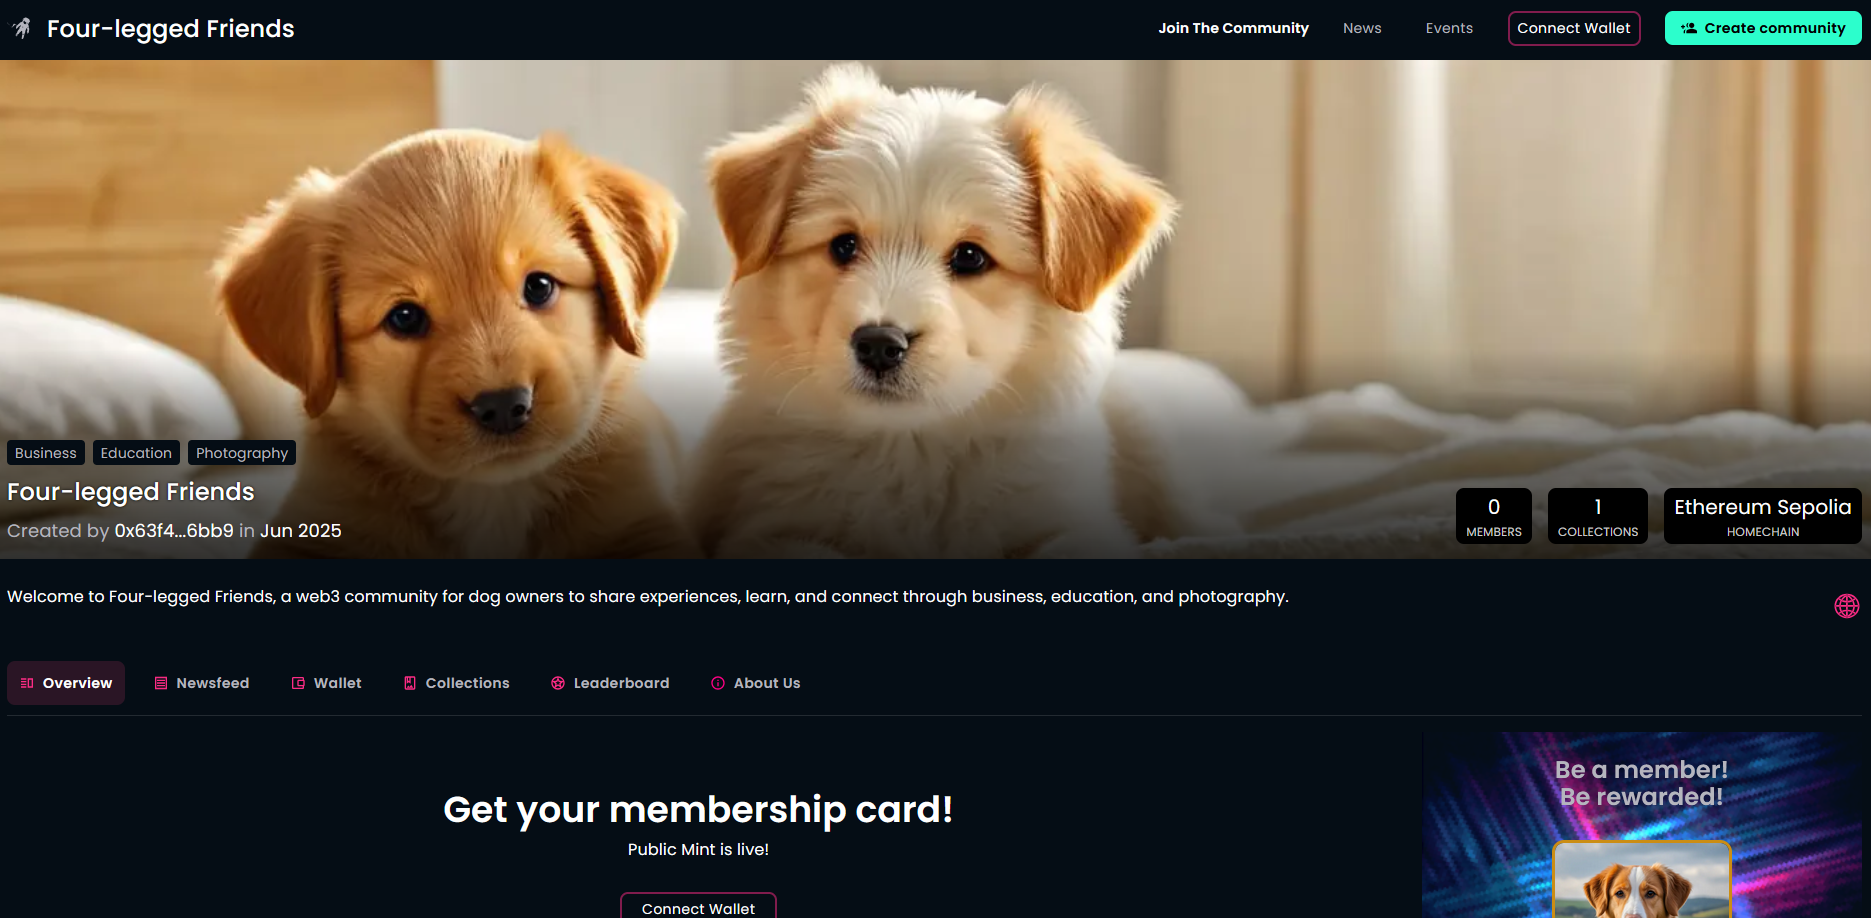
The community website will open in a new tab, here is a picture about it. 
¶ Update, NSFW and Is Public
In case you wish to modify the community website after creation, we provide the possibility to do that in the Mission Control, after selecting your community card on the Dashboard.
For next, select the Community tab on the left side and access the Settings there.
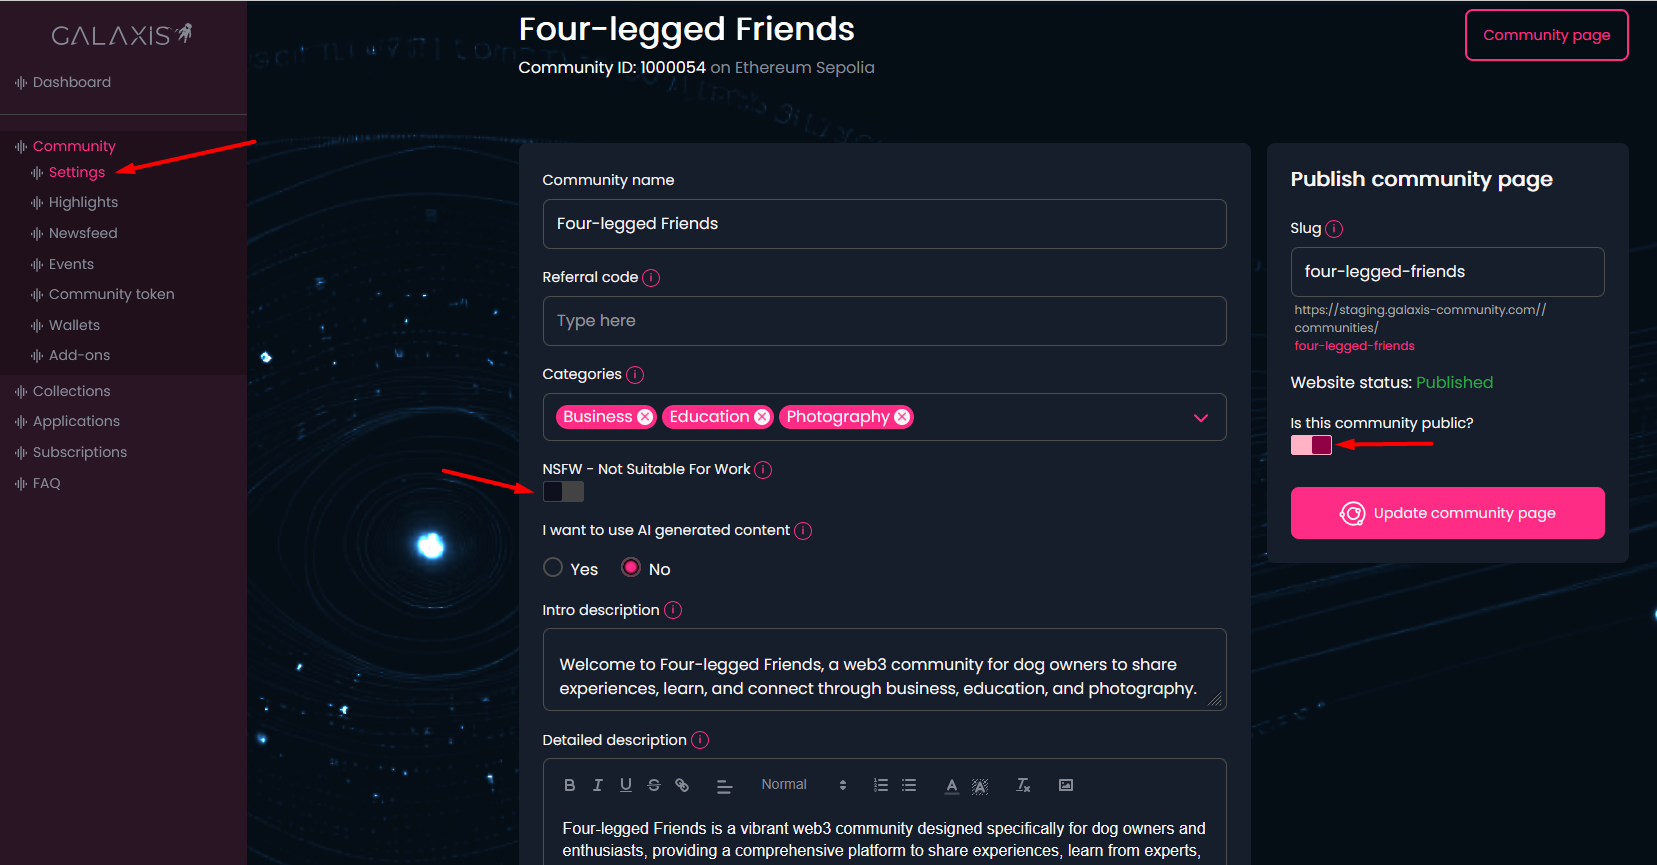
Among the details of the community you can discover two new switches, one is the NSFW - Not Suitable For Work below the Categories, and the other is the Is this community public? below the Website status on the right side.
NSFW refers to communities containing content such as nudity or similar material.
If you enable this button, your community will be hidden from the list of communities on the Communities page, regardless of whether the Is Public option is enabled or not.
However, anyone with a direct link to your community will still be able to access it.
In the future, there will also be an NSFW toggle on the Communities page, allowing visitors to choose whether they want to view communities with more sensitive content.
The Is this community public? or shortly Is Public switch makes it possible for you to simply hide your community from the community list page.
However, anyone with a direct link to your community will still be able to access it.
On this page, you can freely edit the details of your community. However, do not forget to click the Save Changes button at the bottom of the page, and then the Update community page button on the right side, in order for the changes to take effect on the community website.
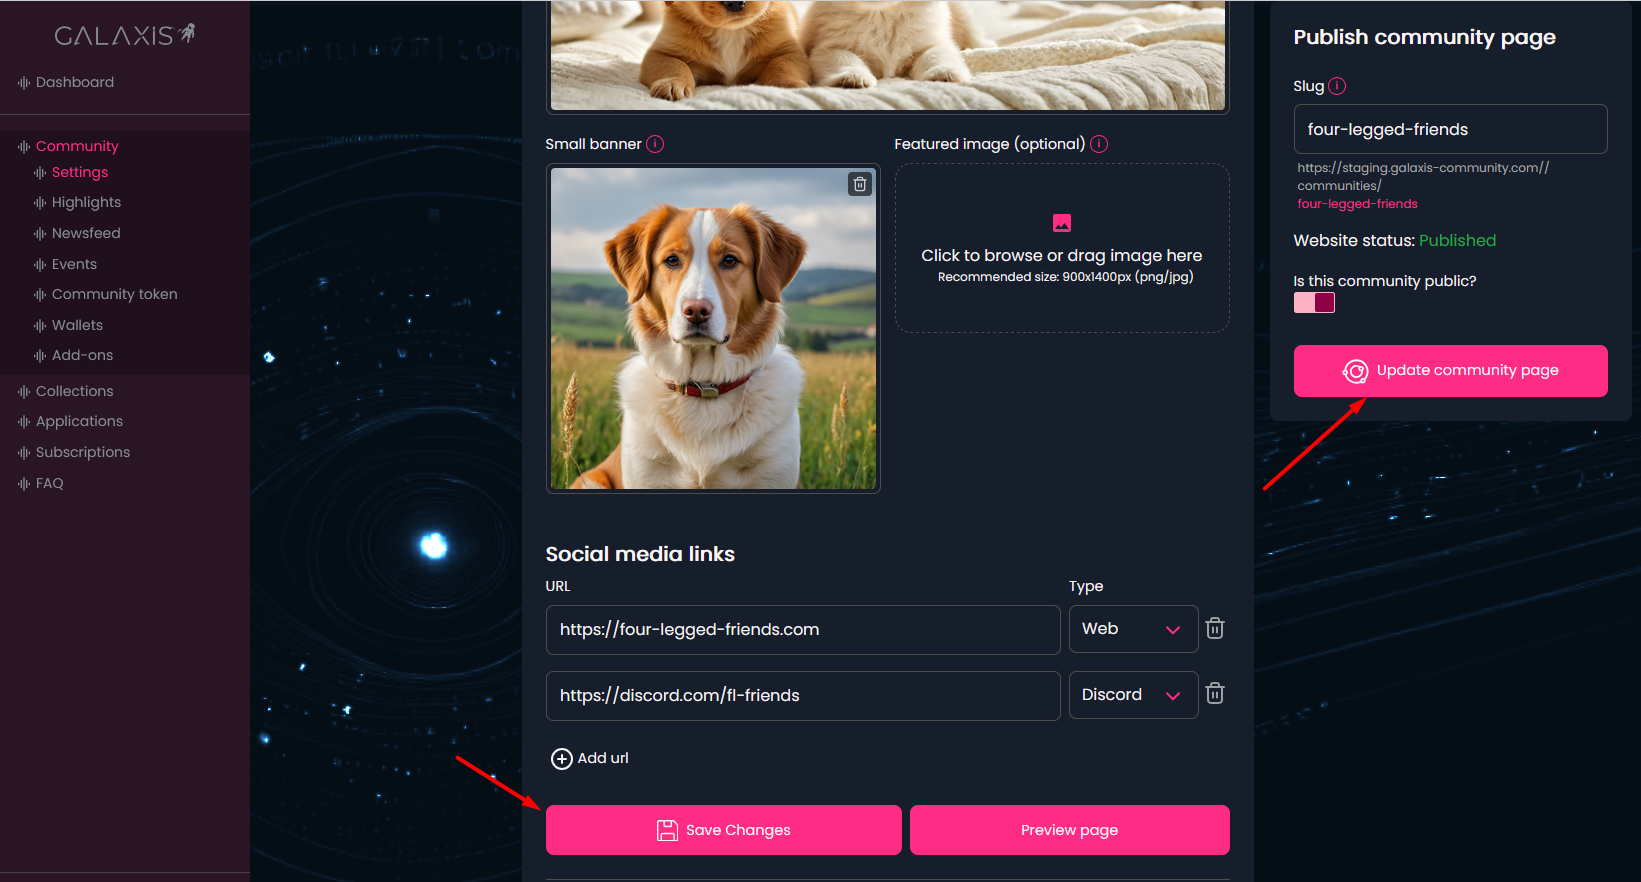
To check the updated community website use the Community page button on the top-right corner of the page.