¶ Collection Management - Community Admin
As a community owner you have the ability to make changes to your existing card collections — for example: enabling random generation or opting for identical cards, adding new layers or images, or even excluding images from future card generations.
¶ Prerequisites
A community that has been created and released.
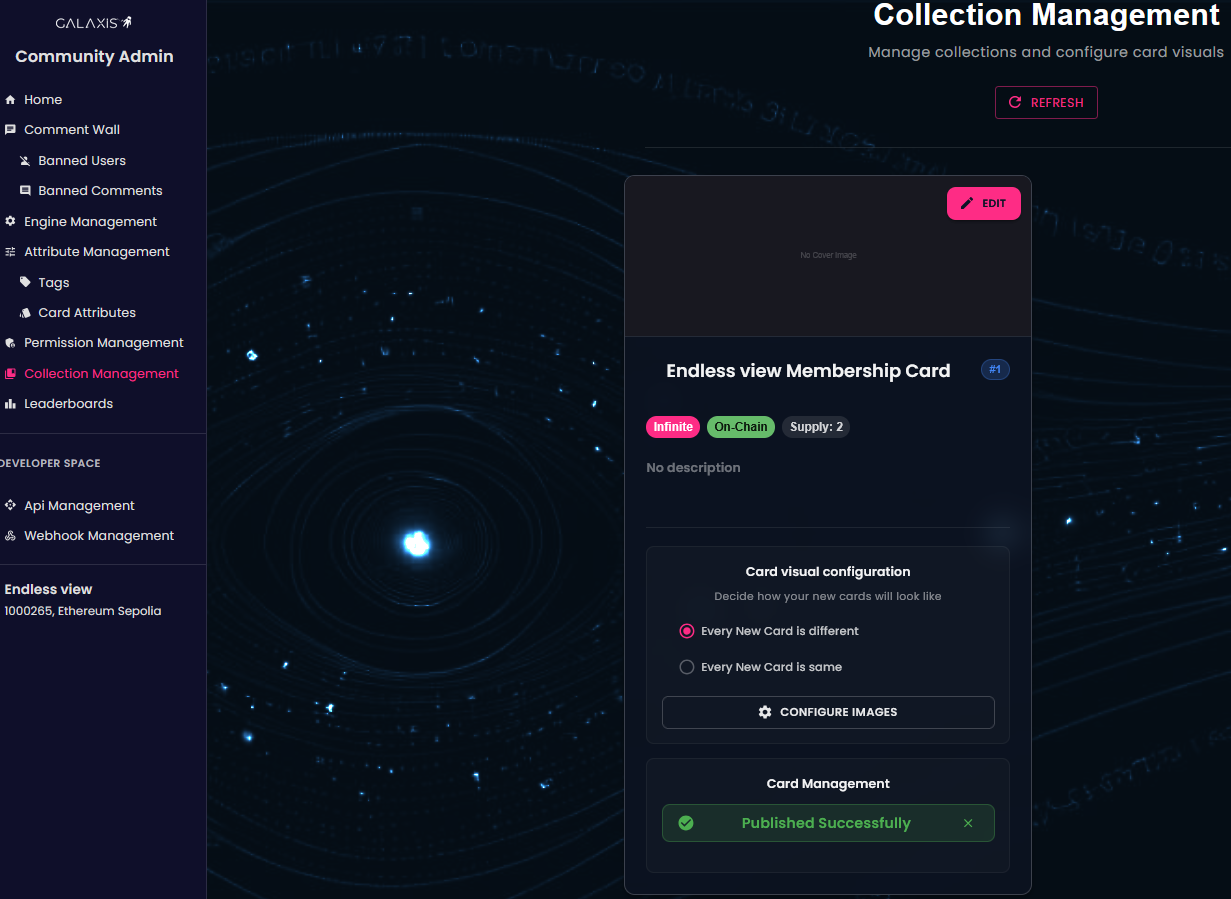
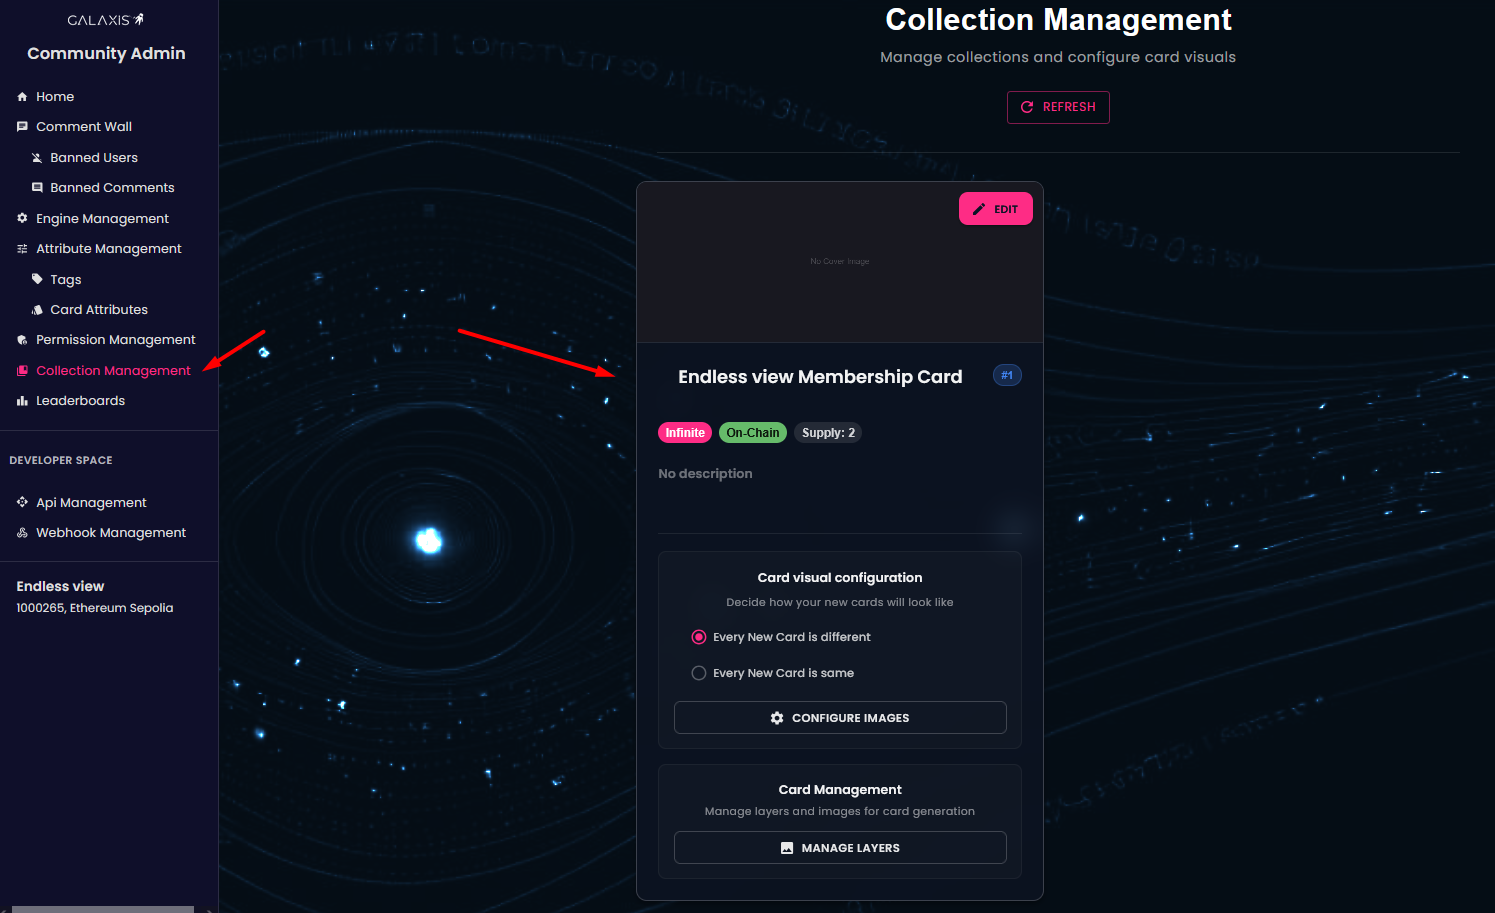
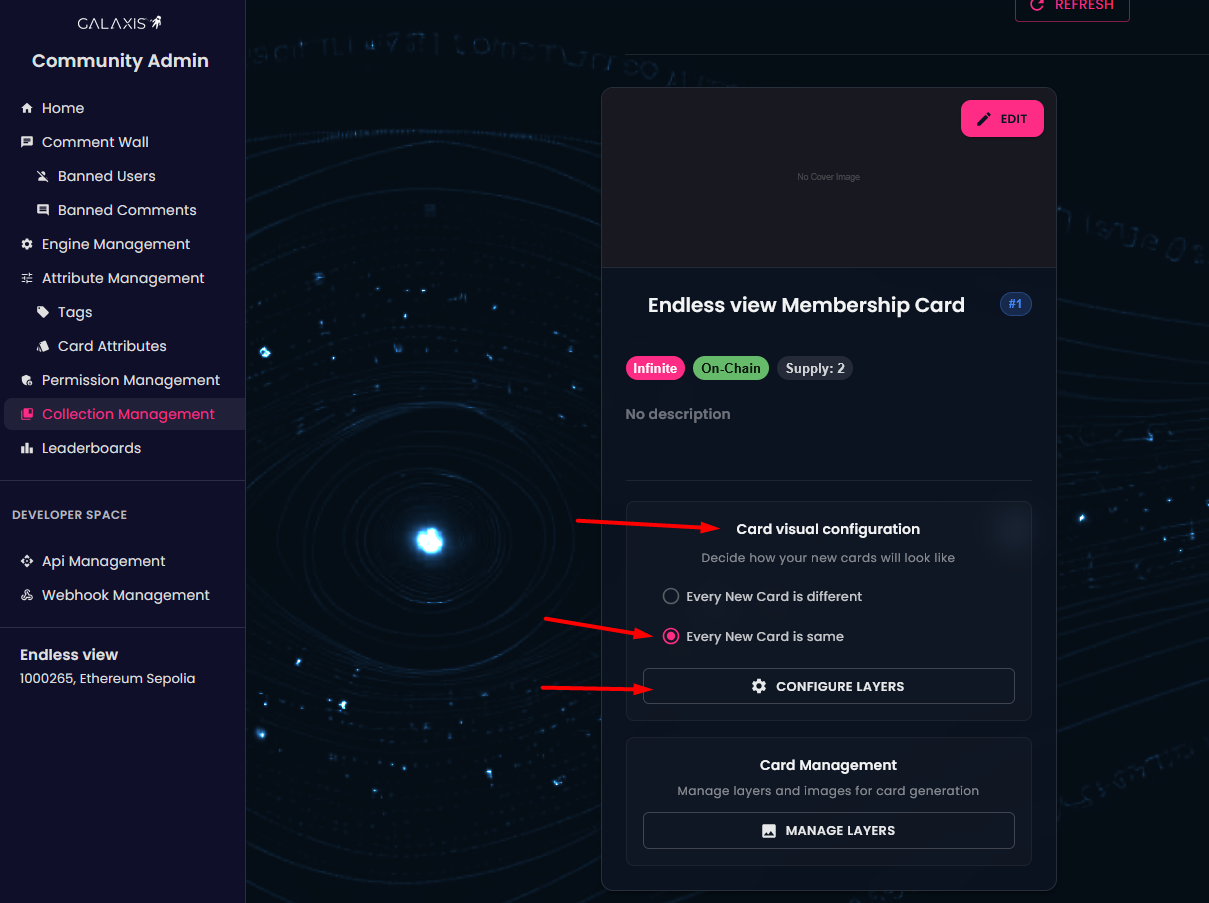
Log in to the Community Admin interface of your created community and select Collection Management from the left-side menu. Here you will see your existing collections and their properties (such as Infinite, On-Chain and Supply). The Supply shows the number of minted cards.
¶ Card Visual Configuration
¶ a.) Every new card is different - cards are randomly generated from the provided images
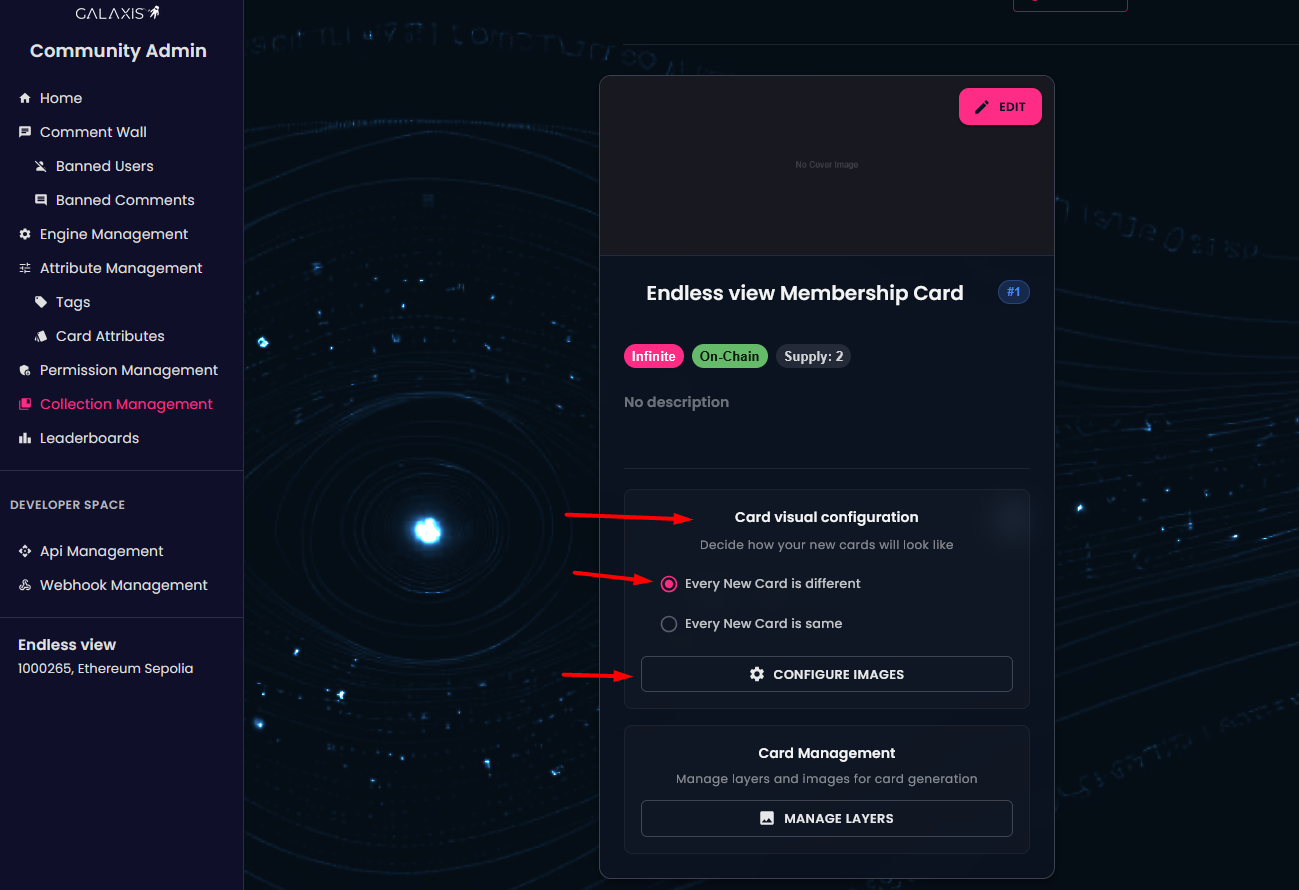
Let us look at Configure Images. Remember, you selected that your images should be generated andomly from the provided images. You can review your already uploaded images, grouped by layer and by card side.
As you can see, each image has the little greeen checkmark on their top-left corner, meaning that it will be used in card generation.
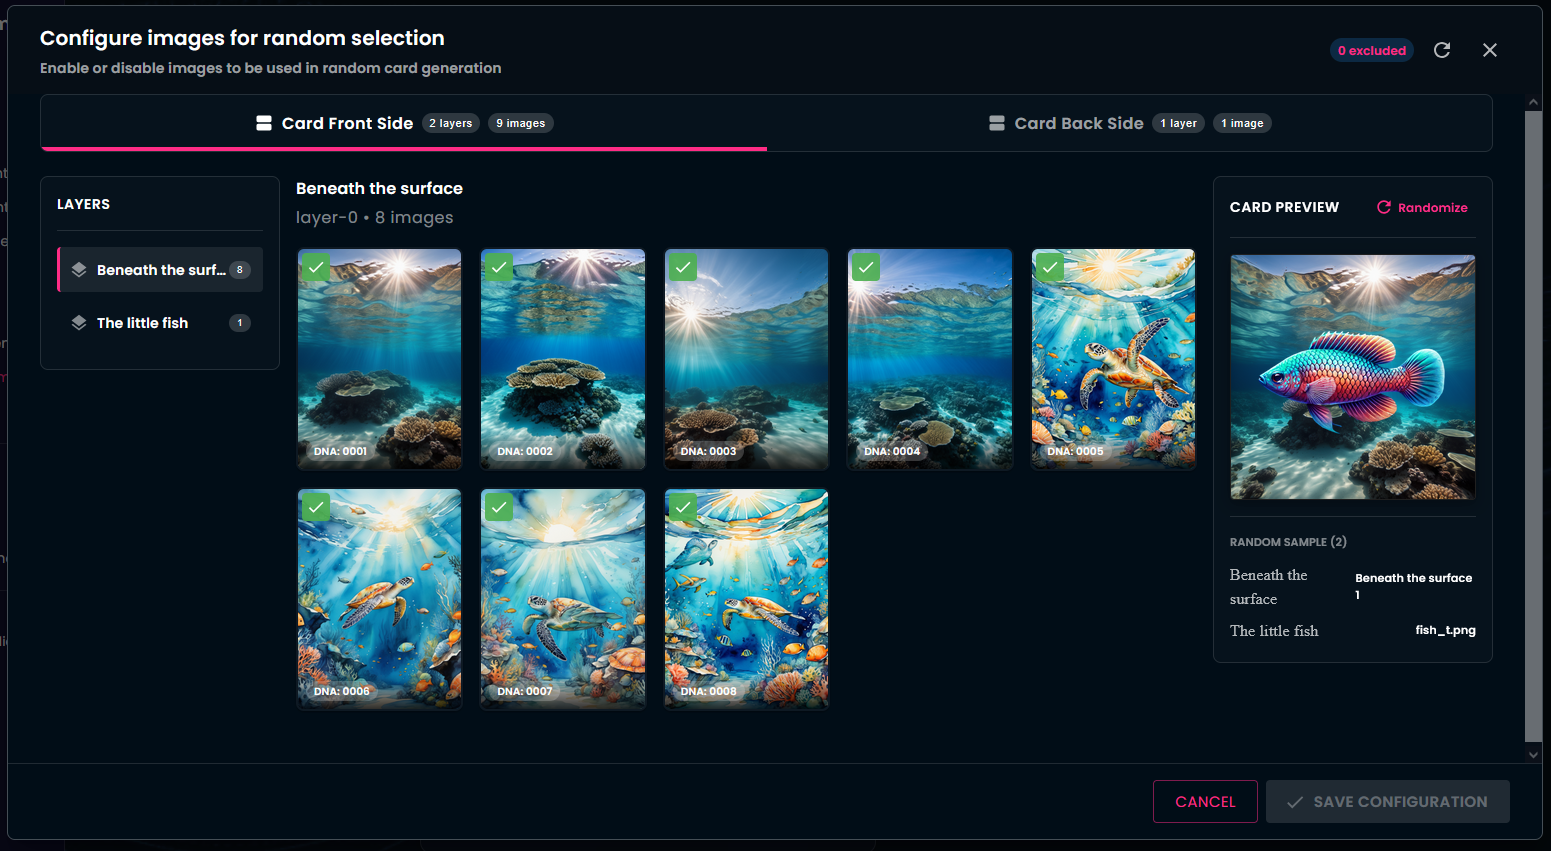
To disable an image from future generations, click the check-mark on that image. If a user already holds a membership card containing that disabled image, the image will remain on that user’s card — however, future new membership cards will no longer include that image.
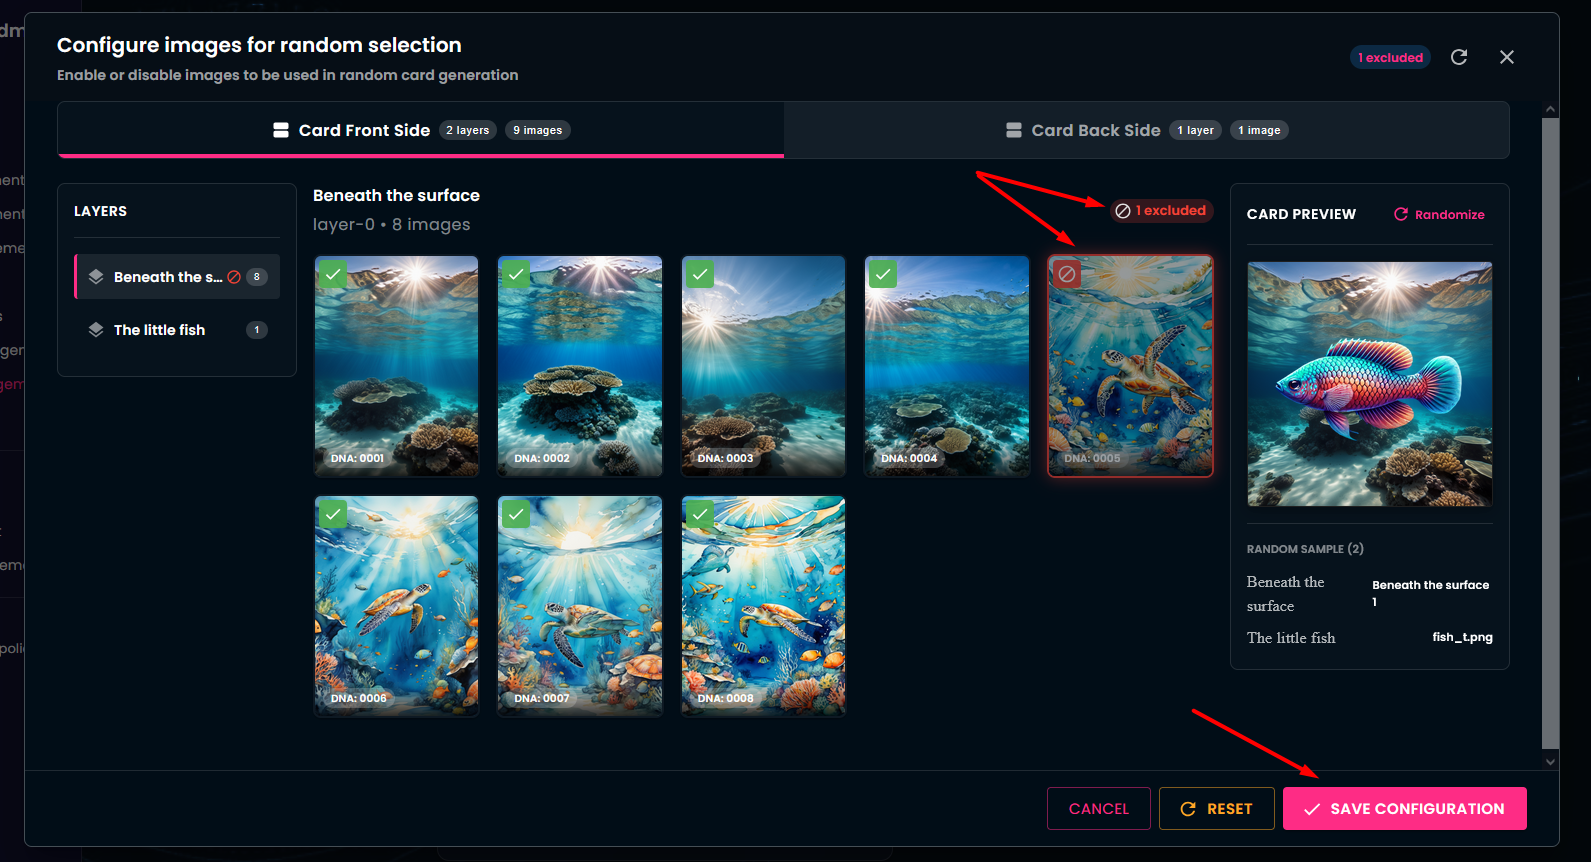
If you change your mind, you can re-enable disabled images.
You may perform these actions for all layers of the cards, including both front and back sides.
Remember to Save Configuration after making the desired changes.
¶ b.) Every new card is the same – all cards are generated identically
Let’s look at Configure Layers. Here you will also find the uploaded images, grouped by layer and by card side.
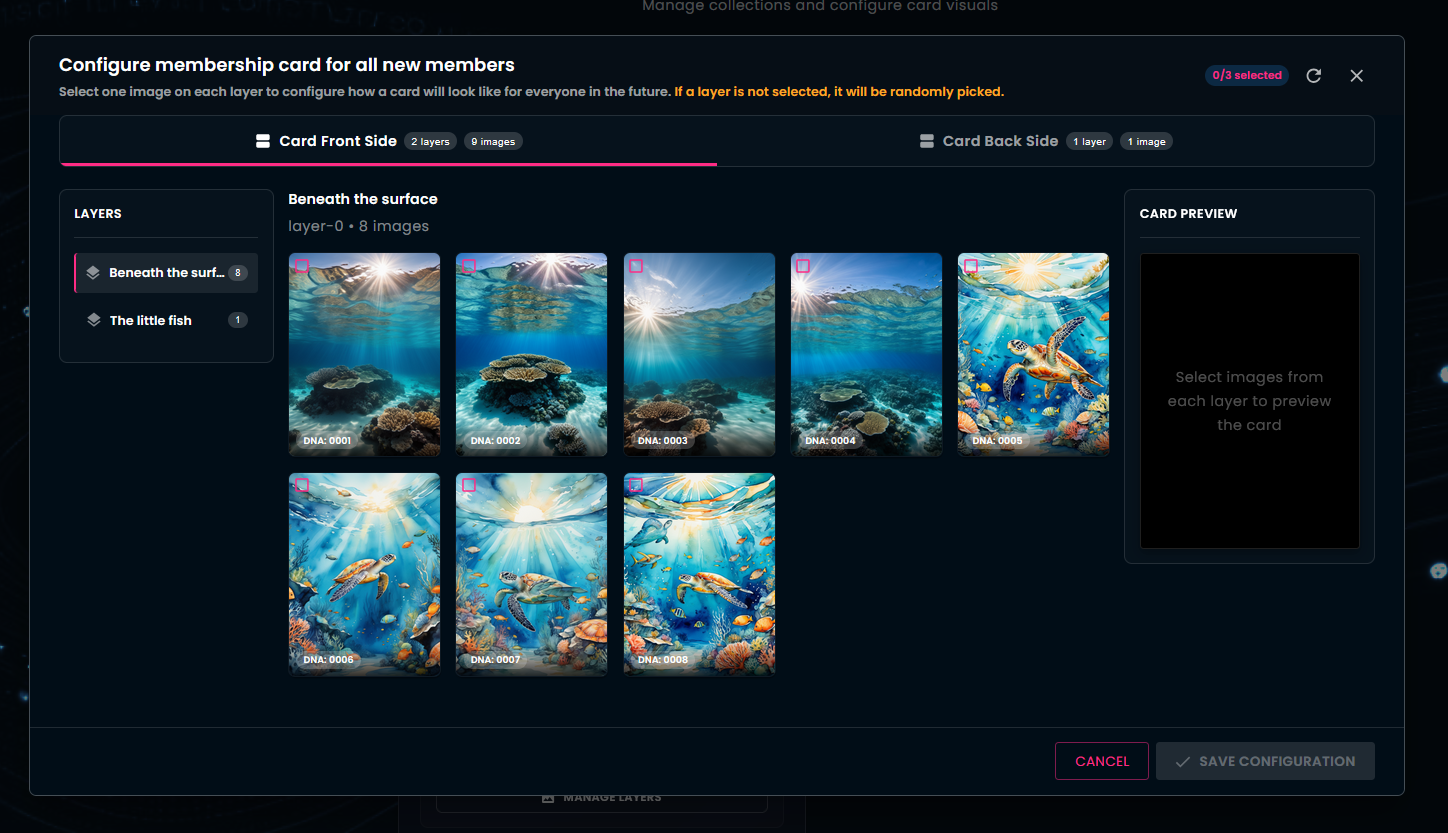
In this case, you must select a specific image for each layer and for each side of the card. The selected images will be used in new card generation, so that every new card will look identical.
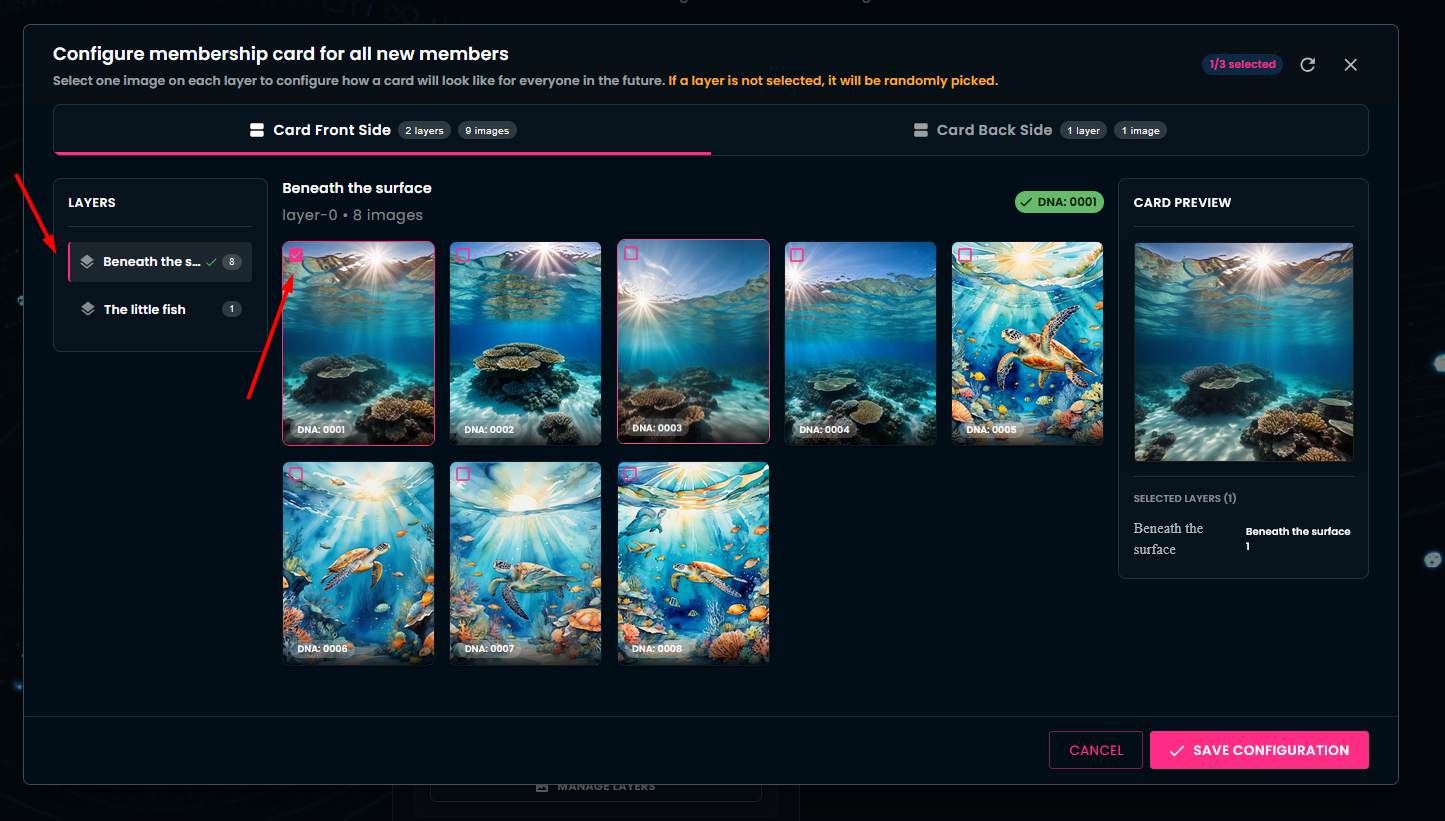
If you do not select a specific image for a layer, one image will be selected automatically.
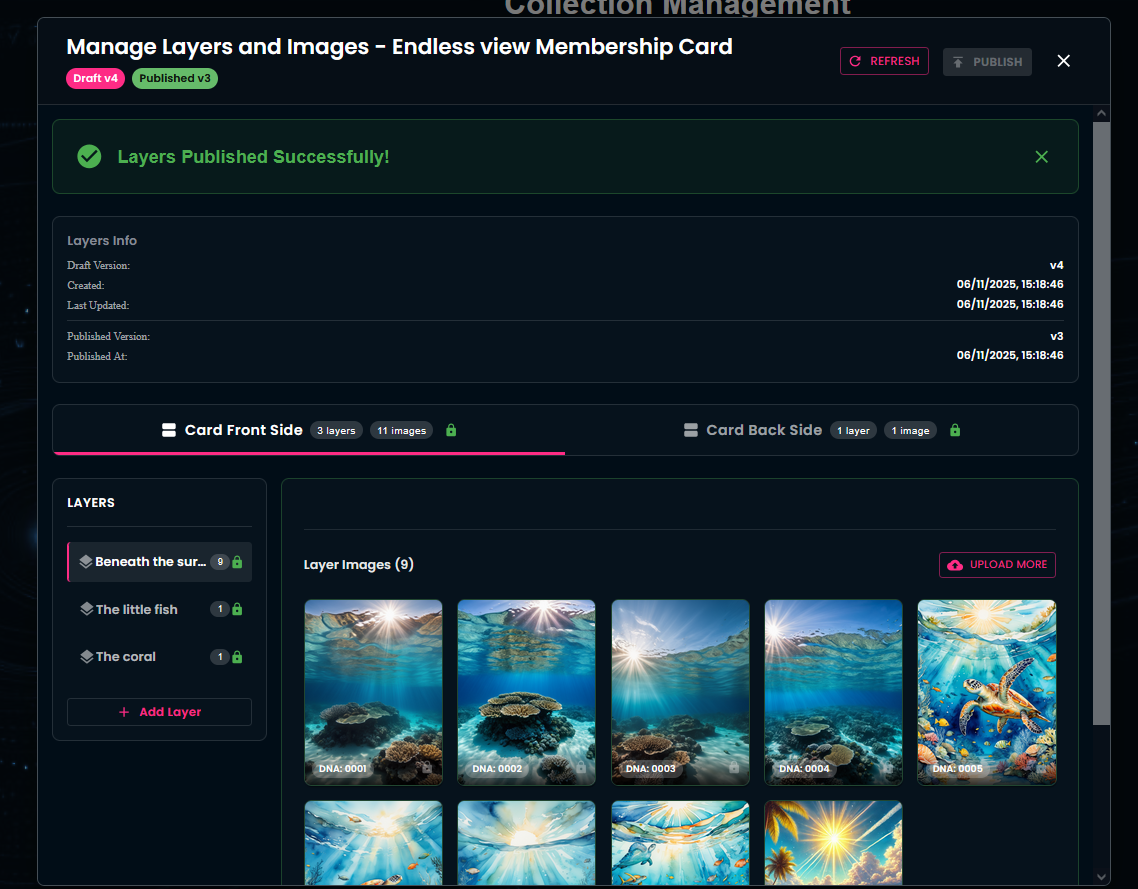
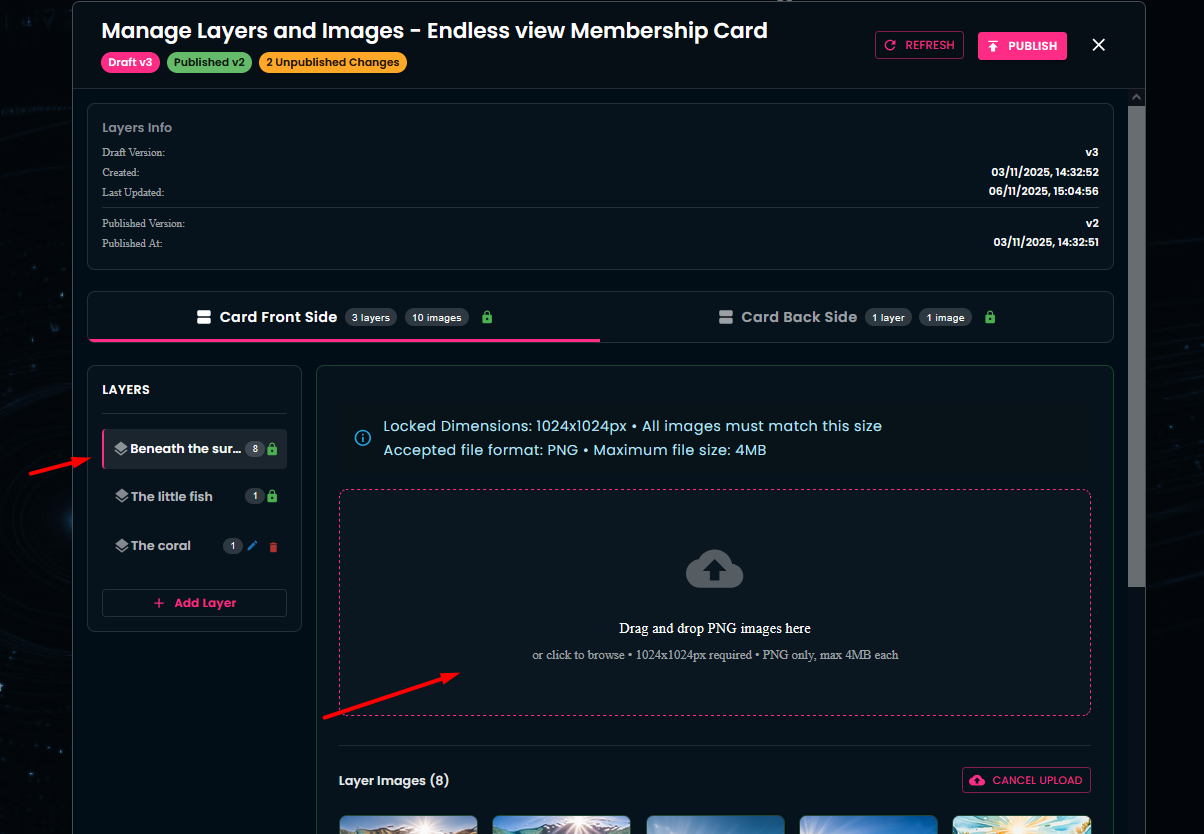
¶ Card Management
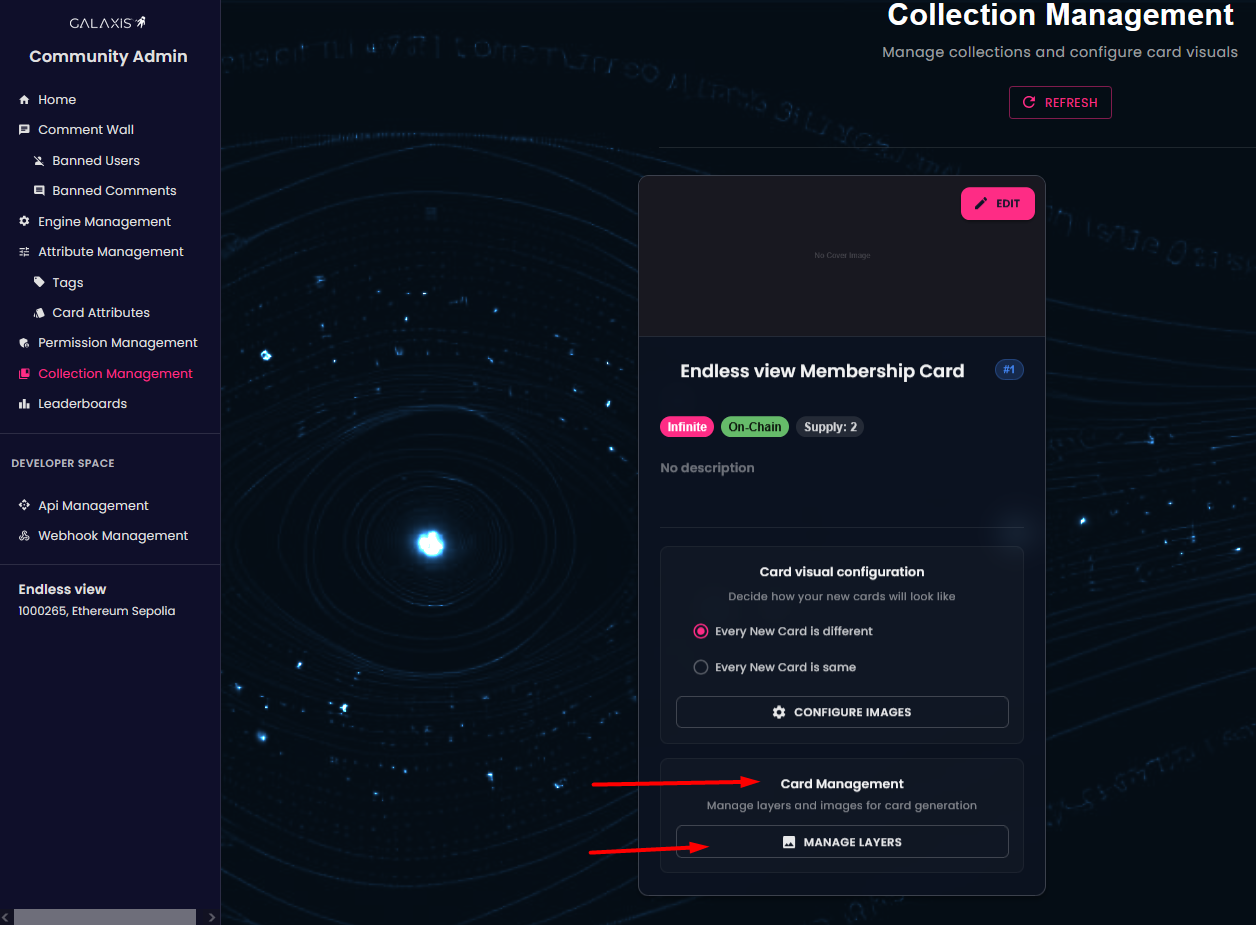
In this section, you have the ability to add new layers and new images to an existing collection. Additionally, the Layer Info area displays an overview of your in-progress work (Draft Version) and of the changes already executed (Published Version).

To add a layer: name the layer and then click the Create Layer button.

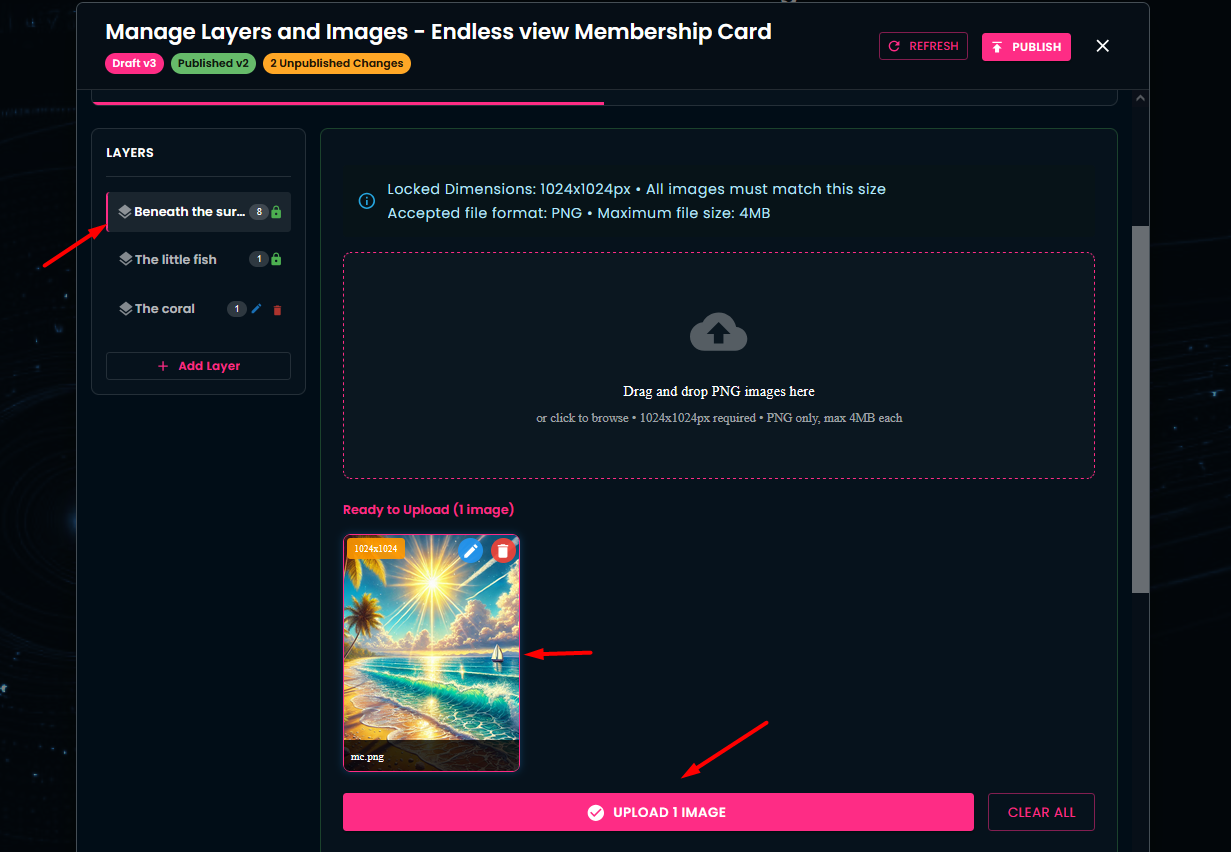
Afterwards, you can upload images for the newly created layer.Afterwards, you can upload images for the newly created layer.
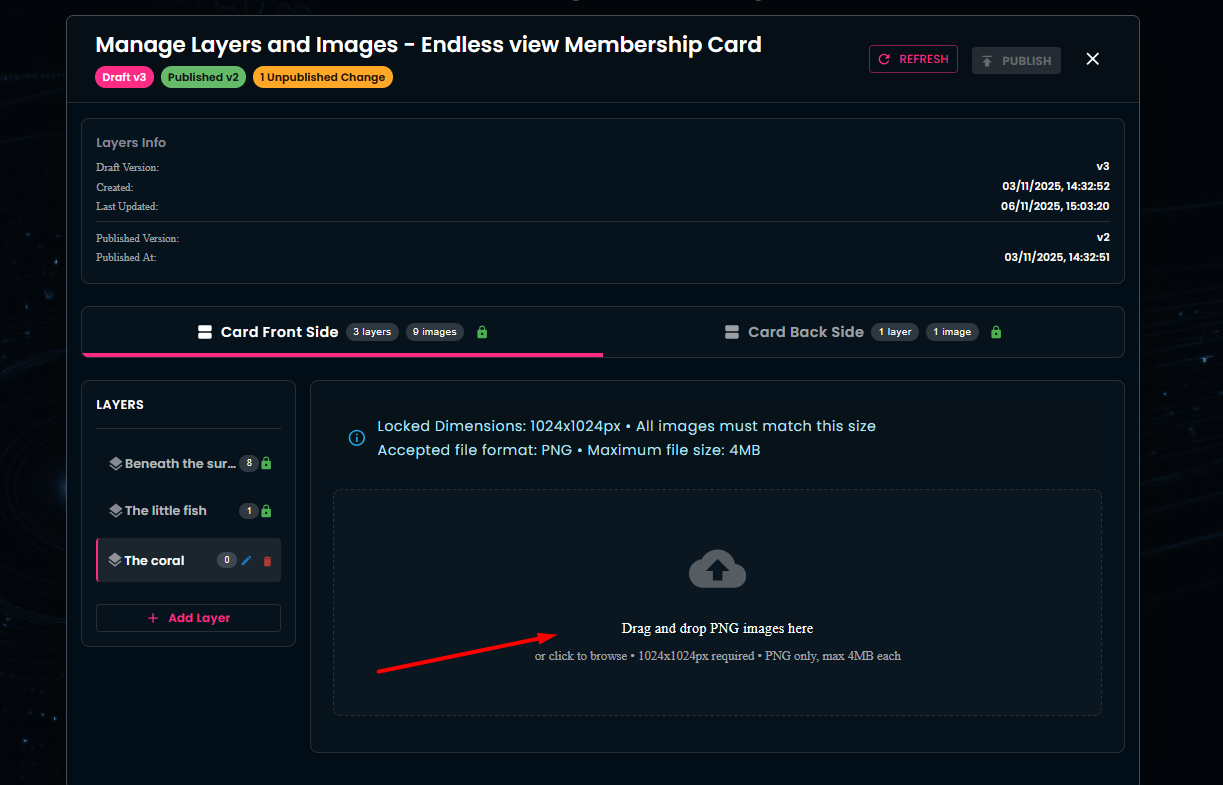
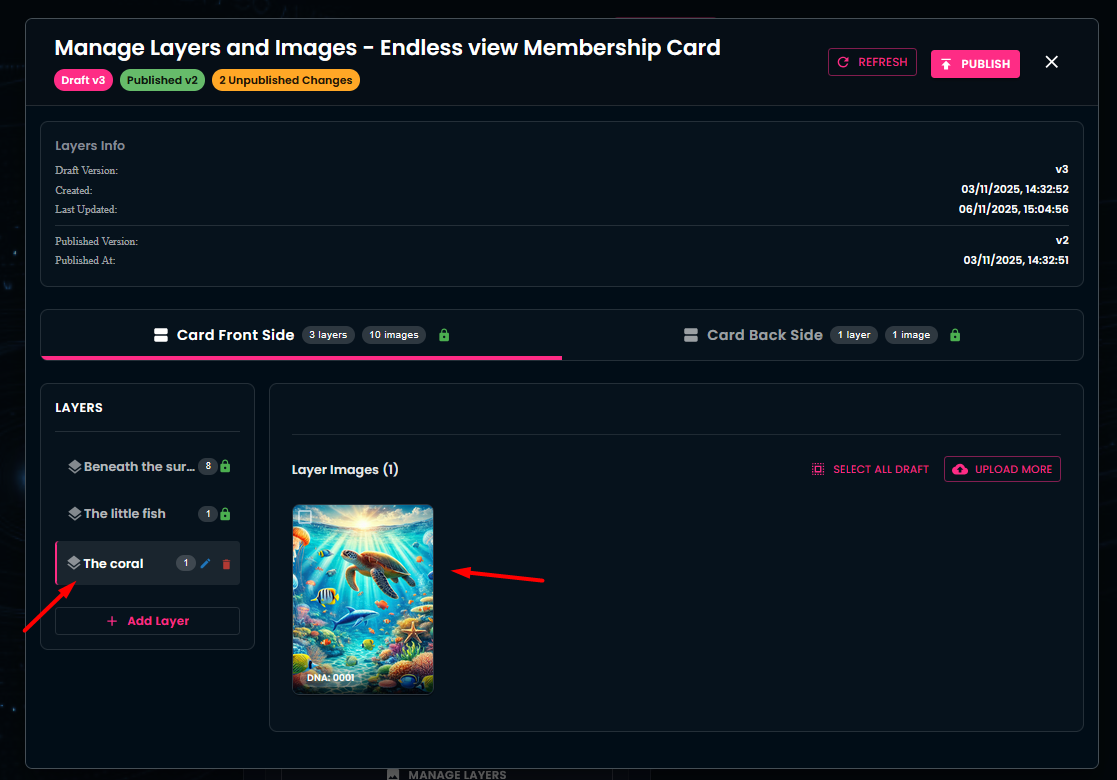
You can also add new images to existing layers if desired.
To apply the changes, don’t forget to publish them. Publishing is final and irreversible.
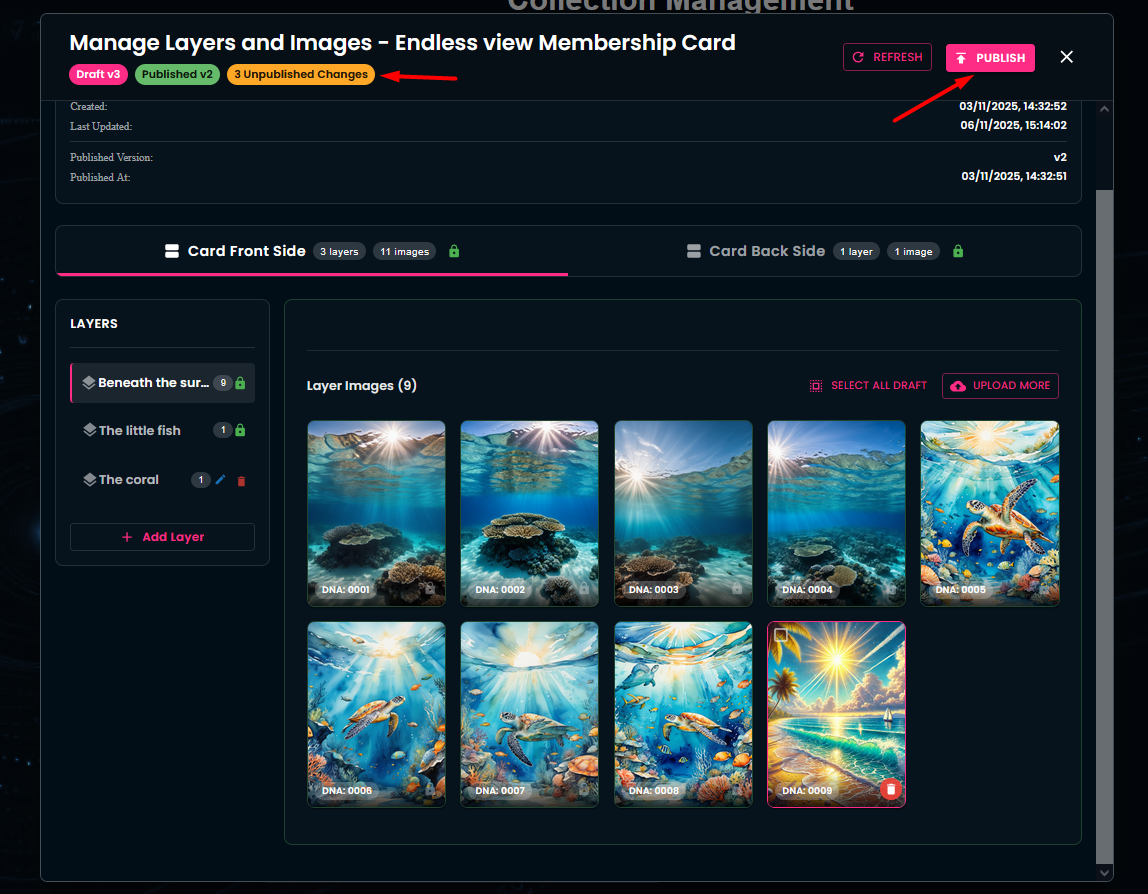

Congratulations! Your changes are now live and visible! Enjoy!